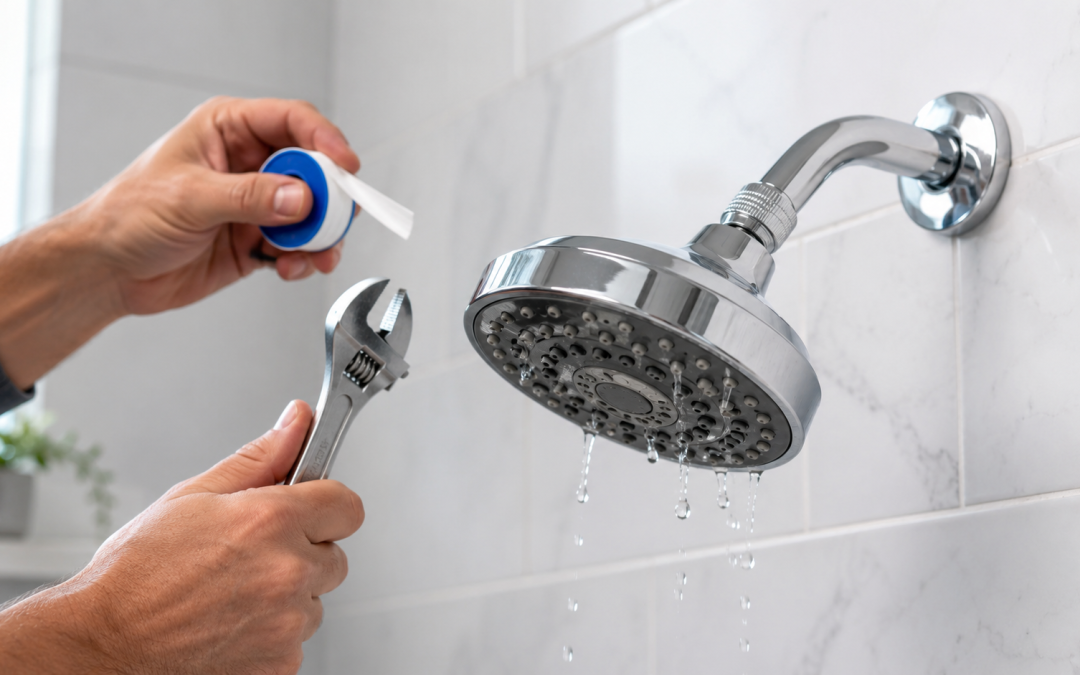
A dripping shower can be more than a small annoyance, especially when the steady sound of water keeps reminding you that something is wrong. Learning how to fix a leaking shower head can help you save water, reduce utility costs, and prevent small plumbing issues from turning into bigger repairs. In many cases, the problem is caused by a worn washer, loose connection, mineral buildup, or a faulty cartridge inside the shower valve. The good news is that some leaks are simple enough for a homeowner to inspect safely with a few basic tools. The even better news is that when the repair is more complicated, a trusted plumber can step in before the situation gets messy, expensive, or both.
Why Is My Shower Head Leaking?
Before you grab a wrench and start turning things, it helps to understand where the leak is coming from. A shower head can leak from the connection where it meets the shower arm, from the nozzles after the water is turned off, or from behind the wall if there is a hidden plumbing issue. Each type of leak can point to a different cause, so taking a few minutes to inspect the problem can save time and frustration. A leak at the connection often means the shower head is loose or the plumber’s tape has worn out. A drip from the face of the shower head may mean water is trapped inside, or it may indicate a deeper issue with the shower valve.
Sometimes, what looks like a leaking shower head is actually leftover water draining from the fixture after use. This is normal if it stops after a few minutes. However, if the shower continues to drip long after the water is turned off, that is a sign of a plumbing issue that needs attention. A constant drip wastes water and can slowly increase your monthly bill. It can also create staining, mineral deposits, and moisture problems in the shower area. In other words, your shower head may be small, but it is fully capable of causing big irritation.
Common Causes of a Leaking Shower Head
A leaking shower head usually comes down to one of several common issues. The cause may be simple, such as a loose fitting, or it may involve parts inside the faucet assembly. Over time, rubber washers, seals, and cartridges can wear down from regular use. Hard water can also leave mineral deposits that interfere with water flow and sealing. Jacksonville and Orange Park homeowners may notice buildup more often, depending on water quality and plumbing age.
Common causes include:
- Loose shower head connection
- Worn rubber washer or O-ring
- Old or damaged plumber’s tape
- Mineral buildup inside the shower head
- Faulty shower valve cartridge
- Worn faucet seat or internal seal
- High water pressure
- Corrosion on older plumbing components
Identifying the cause matters because not every leak is fixed the same way. Tightening a shower head will not solve a bad valve cartridge, just like replacing a washer will not fix a cracked pipe behind the wall. That is why it is important to start with the most visible and accessible parts first. If those simple steps do not stop the leak, the problem may be inside the shower controls. At that point, calling a professional plumber is often the safest and most efficient choice.
Tools and Supplies You May Need
For a basic shower head repair, you do not need an entire garage full of tools. In many cases, a few household items will be enough to inspect, clean, and reseal the fixture. The key is to work carefully so you do not scratch the finish or damage the shower arm. Wrapping metal tools with a cloth can help protect decorative finishes. A little patience also helps, especially if mineral buildup has made parts difficult to loosen.
Useful tools and supplies include:
- Adjustable wrench
- Soft cloth or towel
- Plumber’s tape
- Replacement washer or O-ring
- White vinegar
- Small bowl or plastic bag
- Old toothbrush
- Pliers
- Bucket or towel for catching water
Before beginning, make sure the shower faucet is turned off completely. For most shower head repairs, you do not need to shut off water to the entire home if you are only removing the shower head. However, if you plan to work on the shower valve, cartridge, or faucet handle, it is usually best to shut off the water supply first. This is especially important if you are unsure how the fixture is assembled. Nobody wants a surprise indoor fountain unless it is part of a luxury spa package, and even then, probably not in the bathroom wall.
Step 1: Check the Shower Head Connection
Start by inspecting the area where the shower head connects to the shower arm. If water is leaking from this joint while the shower is running, the connection may be loose or improperly sealed. Try gently tightening the shower head by hand first. If it still feels loose, use an adjustable wrench with a cloth wrapped around the fitting to avoid scratching the finish. Be careful not to overtighten it, because too much force can damage the shower arm or threads.
If tightening does not solve the leak, remove the shower head completely. Turn it counterclockwise until it comes free from the shower arm. Once removed, inspect the threads on both the shower head and the shower arm. Old plumber’s tape may be bunched up, worn, or missing. Clean the threads with a cloth so the new tape can seal properly.
Step 2: Replace the Plumber’s Tape
Plumber’s tape, also called thread seal tape, helps create a watertight seal between threaded plumbing parts. If the tape is old, damaged, or applied incorrectly, water can escape through the connection. After cleaning the threads, wrap new plumber’s tape around the shower arm threads. Wrap it clockwise so it stays in place when the shower head is screwed back on. Two to four wraps are usually enough for a standard shower head connection.
Once the tape is applied, reinstall the shower head by turning it clockwise onto the shower arm. Tighten it by hand first, then use a wrench only if needed. Turn on the shower and check for leaks at the connection. If the leak has stopped, you may have solved the problem with one of the simplest plumbing repairs around. That is always a nice feeling, especially when it does not involve crawling under a sink.
Step 3: Inspect the Washer or O-Ring
If the shower head still leaks, the washer or O-ring inside the connection may be worn out. These small rubber parts help create a seal and prevent water from escaping. Over time, rubber can crack, flatten, harden, or shift out of place. Remove the shower head again and look inside the threaded connection. You may see a small washer seated inside the opening.
If the washer looks damaged or worn, replace it with one of the same size. You can often find replacement washers at a hardware store, but it is helpful to bring the old one with you for comparison. Once the new washer is in place, reinstall the shower head and test the water again. If the connection is dry and secure, the washer was likely the culprit. If water continues dripping from the nozzles after the shower is turned off, the issue may be further back in the valve.
Step 4: Clean Mineral Buildup From the Shower Head
Mineral buildup can clog shower head nozzles and interfere with normal water flow. This is especially common in homes with hard water. When minerals collect inside the shower head, water may spray unevenly, drip after use, or build pressure in places it should not. Cleaning the fixture can improve performance and sometimes reduce dripping. It is also one of the easiest maintenance steps homeowners can do.
To clean the shower head, remove it and soak it in white vinegar for several hours. If you cannot remove it easily, fill a plastic bag with vinegar and secure it around the shower head with a rubber band. After soaking, scrub the nozzles gently with an old toothbrush. Rinse the fixture thoroughly before reinstalling it. Run the shower for a minute or two to flush out loosened debris.
Step 5: Determine Whether the Shower Valve Is the Problem
If your shower head continues dripping when the faucet is off, the problem may not be the shower head at all. In many cases, a constant drip is caused by a worn shower valve cartridge or internal faucet component. The cartridge controls the flow of hot and cold water through the shower. When it wears out, water can pass through even when the handle is in the off position. This can make it seem like the shower head is leaking, even though the real issue is inside the wall-mounted valve.
Replacing a shower cartridge can be more complicated than replacing plumber’s tape or cleaning a shower head. You may need to remove the handle, trim plate, retaining clip, and cartridge. Some cartridges are easy to remove, while others become stuck because of age, corrosion, or mineral buildup. If the wrong part is installed or a component is damaged during removal, the leak can get worse. This is a good time to call a professional plumber, especially if you are not comfortable working with internal shower parts.
When Should You Call a Plumber?
Some shower head leaks are simple enough to handle, but others require professional plumbing service. If you have tried basic fixes and the leak continues, it is better to get expert help than to keep guessing. A plumber can identify whether the issue is with the shower head, shower arm, valve cartridge, water pressure, or hidden plumbing. Professional diagnosis can save you from replacing parts that were never the problem. It can also help prevent water damage behind the wall.
Call a plumber if:
- The shower drips constantly after the water is turned off
- Water leaks from behind the wall or trim plate
- The shower handle is difficult to turn
- You cannot remove the shower head or cartridge safely
- The leak returns after basic repairs
- You notice rust, corrosion, or damaged fittings
- Water pressure seems unusually high
- You are unsure where the leak is coming from
A professional plumber can also recommend whether repair or replacement is the better option. If your shower fixture is old, outdated, or repeatedly causing problems, replacing it may be more cost-effective. Modern plumbing products from trusted brands can improve reliability, water efficiency, and overall shower performance. Plus, there is something satisfying about a shower that works properly and does not provide a background soundtrack of drip, drip, drip.
How to Prevent Future Shower Head Leaks
Preventive maintenance can go a long way toward keeping your shower in good condition. While no fixture lasts forever, regular care can reduce wear and catch issues early. Cleaning mineral buildup, checking connections, and addressing small drips quickly can prevent more serious problems. If your home has hard water, you may need to clean shower heads more often. Staying proactive is usually easier and less expensive than waiting for a leak to become a repair emergency.
To help prevent future leaks:
- Clean your shower head regularly with vinegar
- Avoid overtightening shower fixtures
- Replace worn washers when needed
- Use quality plumber’s tape on threaded connections
- Address small drips as soon as they appear
- Schedule plumbing inspections when fixtures age
- Consider upgrading old or inefficient shower components
It is also wise to pay attention to changes in water pressure, spray pattern, or handle operation. These small changes can be early warning signs that something is wearing out. If you notice the shower handle becoming stiff or loose, do not ignore it. The internal valve may need service before it causes a persistent leak. A little attention today can prevent a lot of cleanup tomorrow.
Why Prompt Repairs Matter
A leaking shower head may not seem urgent at first, but wasted water adds up over time. Even a small drip can send gallons of water down the drain every week. That can increase utility costs and create unnecessary strain on your plumbing fixtures. Leaks can also leave stains, encourage mildew growth, and cause mineral deposits that are harder to remove later. The longer the issue continues, the more likely it is to become inconvenient or expensive.
Prompt repair also helps protect your bathroom from moisture-related problems. If water is leaking behind the wall, the damage may not be visible right away. Hidden leaks can affect drywall, framing, flooring, and nearby rooms. By the time signs appear, the repair may be more involved than a simple fixture replacement. Taking leaks seriously is one of the best ways to protect your home and your budget.
FAQ
Why does my shower head drip after I turn it off?
A brief drip after turning off the shower is often just leftover water draining from the fixture. If the dripping continues for more than a few minutes, the shower valve cartridge or another internal part may be worn and allowing water to pass through.
Can I fix a leaking shower head myself?
Yes, some leaks can be fixed by tightening the shower head, replacing plumber’s tape, changing a washer, or cleaning mineral buildup. If the leak comes from the valve, behind the wall, or continues after basic repairs, it is best to call a plumber.
Do I need to replace the entire shower head?
Not always. If the shower head is in good condition, a new washer, fresh plumber’s tape, or a thorough cleaning may solve the problem. Replacement may be a better option if the fixture is cracked, corroded, outdated, or repeatedly leaking.
What if the shower head leaks only when the water is running?
A leak that happens only while the shower is running often comes from the connection between the shower head and the shower arm. This may be fixed by tightening the connection, replacing the plumber’s tape, or installing a new washer.
What if the shower head drips when the water is off?
A shower head that drips when the water is off usually points to a problem with the shower valve or cartridge. The shower head may not be the actual source of the problem, even though that is where the water appears.
How often should I clean my shower head?
Cleaning your shower head every few months is a good habit, especially if you notice mineral buildup or uneven spray. Homes with hard water may benefit from more frequent cleaning to keep water flowing properly.
Is a leaking shower head an emergency?
A small drip is not always an emergency, but it should not be ignored. If you see water leaking behind the wall, notice sudden pressure changes, or cannot stop the water, call a plumber right away.
Call Lance Maxwell Plumbing for Shower Head Leak Repairs
Knowing the basics of how to fix a leaking shower head can help you troubleshoot simple issues, but you do not have to handle plumbing problems alone. For reliable service from a trusted Jacksonville plumber, turn to us at Lance Maxwell Plumbing. With more than 31 years of experience, we proudly serve the Jacksonville and Orange Park areas with plumbing installation and repair services. Our team offers a full line of plumbing services, including new construction applications, water heater installation, preventive maintenance, and fixture repairs.
At Lance Maxwell Plumbing, our friendly and knowledgeable staff will do whatever it takes to ensure the needs of every customer are met. We also offer on-call 24/7 availability, so you can rest assured that help is available day or night when plumbing issues arise. To accompany our premium services, we provide high-quality plumbing products from trusted brands like Delta, Kohler, and Moen. Whether your shower head will not stop dripping or your plumbing system needs professional attention, we are ready to help. Contact us today, and one of our representatives will be glad to assist you in addressing your needs.