If your shower handle is stiff, your water temperature is unpredictable, or your shower keeps dripping long after you have turned it off, you may be wondering how to replace a shower cartridge. At Lance Maxwell Plumbing, we know a faulty shower cartridge can turn a relaxing shower into a daily plumbing mystery, and not the fun kind. The cartridge is the small but important part inside the shower valve that controls water flow and temperature. When it wears out, mineral buildup, damaged seals, or internal corrosion can cause leaks, poor pressure, or frustrating temperature swings. The good news is that replacing a shower cartridge is often a manageable project for homeowners with the right tools, patience, and attention to detail. The even better news is that our team is always here when the job becomes more complicated than expected.
What Is a Shower Cartridge?
A shower cartridge is the internal valve component located behind the shower handle. Its job is to regulate how much hot and cold water flows through the showerhead. When you turn the handle, the cartridge moves inside the valve body to adjust water flow and temperature. Over time, this part can wear out, especially in homes with hard water, older plumbing, or frequent shower use. A worn cartridge may not seal properly, which can lead to leaks, drips, or trouble getting the right water temperature. In other words, it may be small, but it has a big responsibility every morning.
Most modern single-handle showers use a cartridge-style valve instead of separate hot and cold handles. Many trusted plumbing brands, including Delta, Kohler, and Moen, manufacture cartridges that are designed for specific valve models. That means choosing the correct replacement cartridge is one of the most important parts of the job. A cartridge that looks “close enough” may not fit correctly, and plumbing is not usually a place where “close enough” ends well. Before beginning the replacement, it helps to identify the brand and model of your shower valve. If you are unsure, a licensed plumber can help you avoid buying the wrong part or damaging the valve body.
Signs Your Shower Cartridge Needs to Be Replaced
A faulty shower cartridge usually gives you warning signs before it completely fails. One of the most common signs is a dripping showerhead, even when the handle is turned fully off. You may also notice that the handle feels loose, stiff, or difficult to turn. In some cases, the shower may deliver only hot water, only cold water, or temperatures that change without warning. Low water pressure can also occur if the cartridge is blocked by sediment or mineral deposits. If your shower seems to have a personality of its own, the cartridge may be the reason.
Here are a few common signs that replacement may be needed:
- The showerhead drips after the water is turned off
- The handle is hard to turn or feels stuck
- Water temperature is difficult to control
- The shower suddenly runs too hot or too cold
- Water pressure has dropped without an obvious cause
- The handle leaks around the trim plate
- You hear squeaking, grinding, or unusual resistance when turning the handle
These issues can worsen over time if ignored. A small drip may waste water and raise utility costs, while temperature problems can become a safety concern. This is especially important in homes with children, older adults, or anyone sensitive to sudden temperature changes. A failing cartridge can also put stress on other plumbing components if the valve is not operating correctly. Addressing the issue early can prevent more expensive repairs later. When in doubt, it is best to have the problem inspected before a small annoyance becomes a bigger plumbing headache.
Tools and Materials You May Need
Before starting the project, gather the right tools and replacement parts. Having everything ready makes the process smoother and helps prevent unnecessary trips to the hardware store. The exact tools may vary depending on your shower brand and valve style, but most cartridge replacements require a few basic items. You will also need the correct replacement cartridge for your specific shower valve. If your old cartridge is stuck, you may need a cartridge puller, especially for some Moen-style valves. This is one of those projects where preparation saves time, frustration, and possibly a few creative words.
Common tools and materials include:
- Replacement shower cartridge
- Phillips and flathead screwdrivers
- Allen wrench or hex key
- Adjustable wrench or pliers
- Needle-nose pliers
- Cartridge puller, if needed
- Plumber’s grease
- Towels or rags
- Flashlight
- Utility knife
- Small container for screws and clips
It is also wise to keep a towel over the drain while you work. Tiny screws and retaining clips have a special talent for disappearing at the worst possible moment. A small container can help keep parts organized as you remove them. Taking a photo before and during disassembly can also make reassembly easier. If your shower trim has caulk around it, a utility knife can help carefully cut through the seal. Just be gentle, since damaging the trim or wall surface can add extra work to what should be a straightforward repair.
Step 1: Turn Off the Water Supply
The first and most important step is turning off the water supply. Some showers have a local shutoff valve located behind the trim plate, but many homes require shutting off water to the entire house. Once the water is off, turn the shower handle to release any remaining pressure in the line. This helps reduce water spills when the valve is opened. Place towels around the shower area to catch any water that may drip during the repair. Skipping this step can quickly turn a cartridge replacement into an indoor water feature, and not the kind anyone asked for.
After shutting off the water, confirm that no water flows from the showerhead. If water continues running, the shutoff may not be fully closed, or there may be another issue with the plumbing system. Do not remove the cartridge until you are certain the water is off. Working on a pressurized valve can cause water to spray out suddenly and may damage the valve or the surrounding wall. If you cannot locate the shutoff or the valve does not stop the water completely, it is time to call a professional. At Lance Maxwell Plumbing, we can safely handle shutoff issues and cartridge replacements throughout Jacksonville and Orange Park.
Step 2: Remove the Shower Handle and Trim
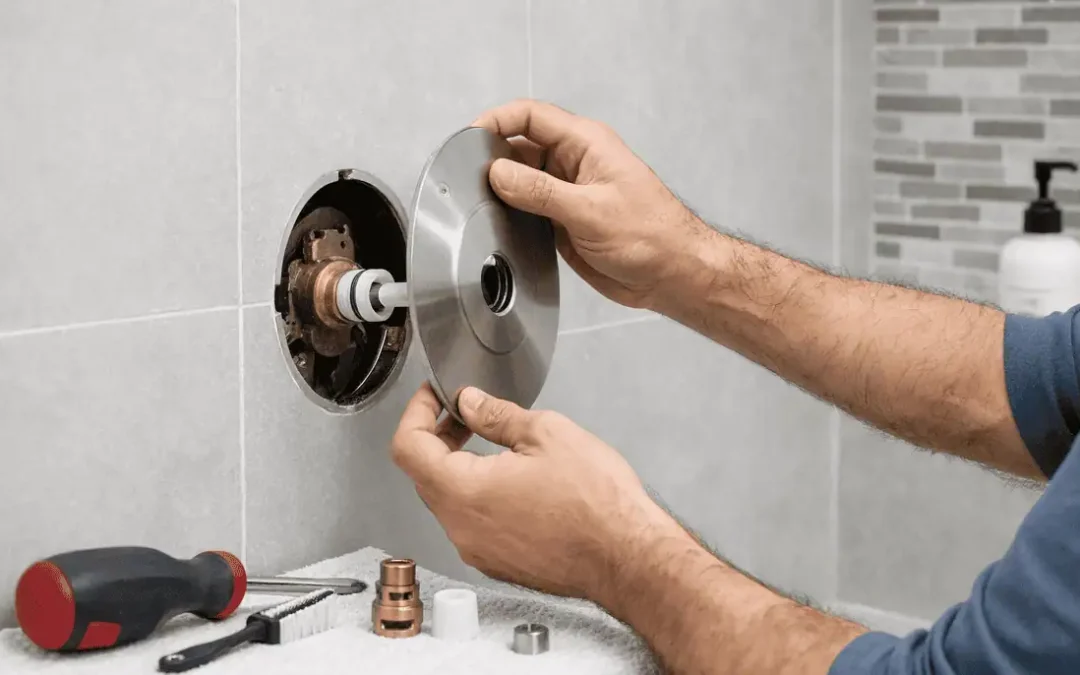
Once the water is off, remove the shower handle. Many handles have a small set screw located underneath or on the side, often requiring an Allen wrench. Other handles may have a visible screw hidden behind a decorative cap. Carefully remove the screw and pull the handle away from the wall. If the handle is stuck due to mineral buildup, avoid forcing it too aggressively. Gentle movement and patience can help prevent damage to the handle or valve stem.
Next, remove the trim plate or escutcheon. This plate covers the valve opening and gives the shower a finished look. Some trim plates are held in place with screws, while others may be sealed with caulk. If caulk is present, carefully cut around the edge before pulling the plate away from the wall. Once removed, you should be able to see the valve body and cartridge assembly. Keep all screws and parts in order, so reinstallation is simple.
Step 3: Identify the Retaining Clip or Nut
Most cartridges are held in place by a retaining clip, retaining nut, or similar fastener. This part keeps the cartridge secure inside the valve body. Use a flashlight to inspect the valve and determine how the cartridge is held in place. If there is a retaining clip, use needle-nose pliers to pull it straight out. If there is a retaining nut, use an adjustable wrench to loosen it carefully. Avoid bending, breaking, or losing these parts, since they are necessary for proper reassembly.
This step is also a good time to inspect the area for corrosion or mineral buildup. In older homes or areas with hard water, the cartridge may be difficult to remove. If the retaining clip or nut appears severely corroded, forcing it can damage the valve body. A damaged valve body may require a more involved repair behind the wall. That is one reason professional help can be valuable, especially when the shower valve has not been serviced in many years. Sometimes the most affordable repair is the one that avoids turning a small job into a bigger one.
Step 4: Remove the Old Cartridge
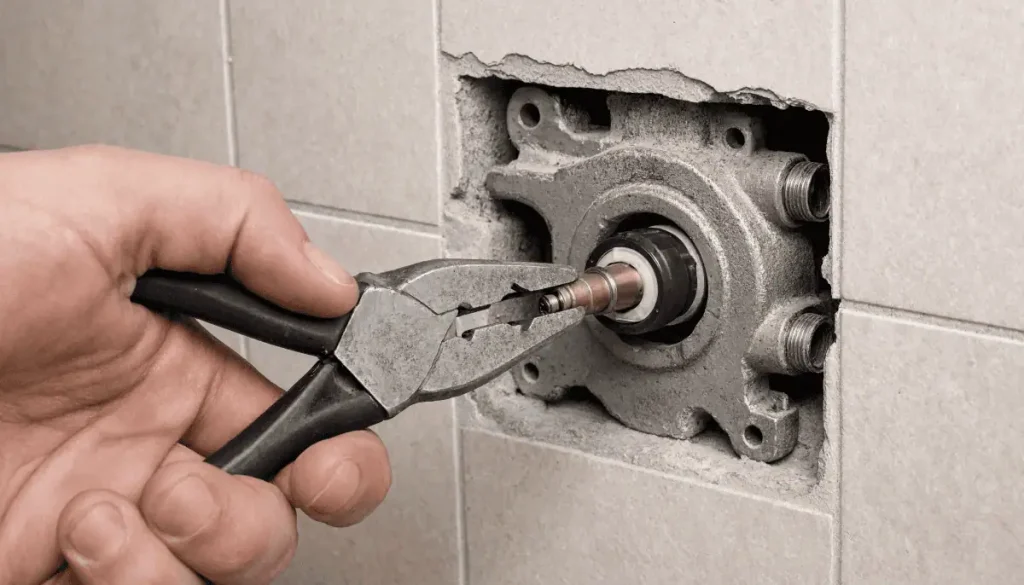
After removing the retaining clip or nut, pull the cartridge straight out from the valve body. Some cartridges come out easily with pliers, while others require a cartridge puller. If using pliers, grip the cartridge stem gently but firmly and pull straight outward. Avoid twisting too hard unless the manufacturer’s instructions allow it, because excessive force can damage the valve. If the cartridge is stuck, do not pry against the shower wall or valve body. This is where patience matters, because the cartridge may be held in place by years of mineral buildup.
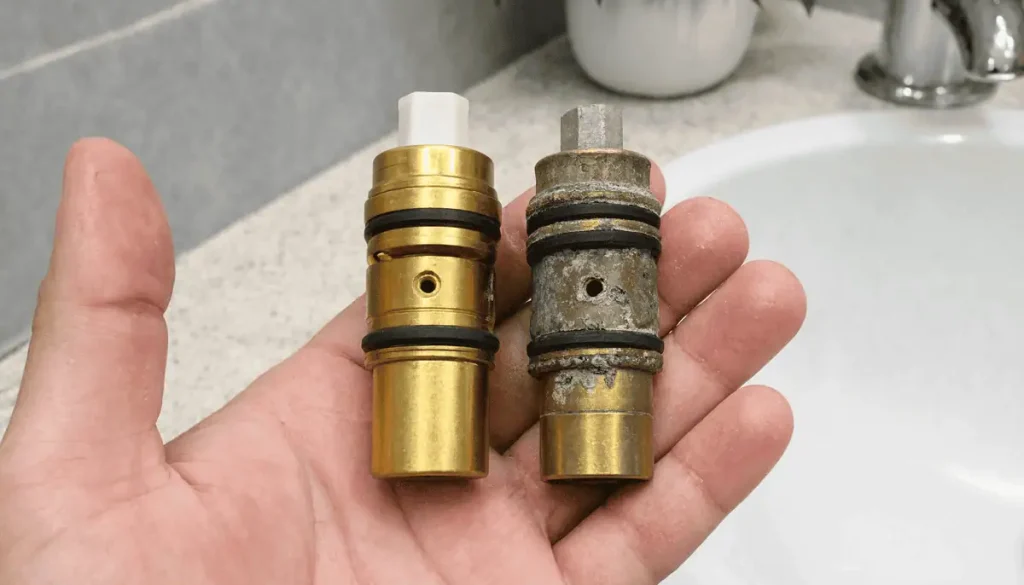
Once the cartridge is removed, inspect it carefully. You may see worn rubber seals, cracks, corrosion, or sediment buildup. Take note of the cartridge orientation before discarding it. Many cartridges must be installed in the correct position to ensure that hot and cold water work properly. If the new cartridge is installed backward, your hot and cold sides may be reversed. That is not dangerous in every case, but it is definitely not ideal when someone expects warm water and gets a chilly surprise.
Step 5: Prepare and Install the New Cartridge
Before installing the new cartridge, clean the inside of the valve body with a clean rag. Remove visible debris, mineral deposits, or old rubber fragments. Do not use harsh tools that could scratch the valve interior. Apply a small amount of plumber’s grease to the rubber seals on the new cartridge, unless the manufacturer’s instructions say otherwise. This helps the cartridge slide into place and can make future removal easier. Make sure the new cartridge matches the old one exactly before installation.
Insert the new cartridge in the same orientation as the old cartridge. Push it straight into the valve body until it is fully seated. Reinstall the retaining clip or nut to secure it in place. The cartridge should not wobble or move loosely once secured. If the retaining clip does not slide back into place, the cartridge may not be fully seated. Do not force the trim or handle back on until the cartridge is properly installed.
Step 6: Reassemble the Shower and Test It
After the cartridge is installed, reattach the trim plate and handle. Make sure the handle is aligned correctly and moves smoothly. Turn the water supply back on slowly and check for leaks around the valve and showerhead. Test both hot and cold water to confirm the temperature adjustment works properly. Let the shower run for a short time to flush out any trapped air or loose debris. If everything works as expected, the repair is complete.
If the shower still drips, the handle feels wrong, or the temperature does not adjust correctly, there may be another issue. The cartridge may not be seated properly, the valve body may be damaged, or the replacement part may not be the correct model. Some pressure-balancing valves also require additional adjustment after cartridge replacement. If you notice leaking behind the trim plate, turn off the water and call a plumber right away. Water behind the wall can lead to damage if it is not addressed quickly. Our team at Lance Maxwell Plumbing can diagnose the problem and provide the right repair.
When Should You Call a Professional Plumber?
Replacing a shower cartridge can be a good DIY project for someone who is comfortable working with basic plumbing parts. However, not every cartridge replacement is simple. If the cartridge is stuck, the valve is corroded, the shutoff valve will not work, or you are unsure which replacement part to use, calling a professional is the safer choice. A plumber can also identify whether the cartridge is truly the problem or whether another part of the shower valve needs attention. This can save time and prevent unnecessary damage. Plumbing repairs are often easiest when handled before frustration takes over.
You should consider calling a plumber if:
- You cannot shut off the water completely
- The cartridge is stuck inside the valve
- The retaining clip or nut is corroded
- You are unsure of the cartridge brand or model
- Water is leaking behind the wall
- The shower still leaks after replacement
- The valve body appears damaged
- You are replacing parts in an older plumbing system
At Lance Maxwell Plumbing, we have more than 31 years of experience providing plumbing installation and repair services in the Jacksonville and Orange Park areas. We work with high-quality plumbing products from trusted brands like Delta, Kohler, and Moen. Whether your shower needs a simple cartridge replacement or a more complete valve repair, our friendly and knowledgeable team can help. We understand that plumbing problems do not always happen during convenient business hours. That is why our on-call 24/7 availability gives customers peace of mind, day or night.
FAQ
How do I know what shower cartridge I need?
The best way is to identify the brand and model of your shower valve. Look for markings on the trim, handle, or old cartridge. If you are unsure, take the old cartridge to a plumbing supply store or call a professional plumber for help.
Can I replace a shower cartridge myself?
Yes, many homeowners can replace a shower cartridge with basic tools and the correct part. However, the job can become difficult if the cartridge is stuck, the valve is corroded, or the water supply cannot be fully shut off.
Why is my shower still leaking after replacing the cartridge?
The new cartridge may not be seated correctly, the wrong cartridge may have been installed, or the valve body may be damaged. In some cases, debris inside the valve can also prevent a proper seal.
How long does a shower cartridge last?
A shower cartridge can last several years, but its lifespan depends on water quality, usage, and the condition of the plumbing system. Hard water and mineral buildup can cause cartridges to wear out faster.
Do I need to turn off the water before replacing a shower cartridge?
Yes, the water supply must be turned off before removing the cartridge. Failing to do so can cause water to spray from the valve and may lead to damage.
What happens if I install the cartridge backward?
In many cases, hot and cold water may be reversed. Some cartridges are designed with a specific orientation, so always follow the manufacturer’s instructions or match the position of the old cartridge.
Is a dripping shower always caused by a bad cartridge?
Not always, but a worn cartridge is one of the most common causes. Other possible causes include a damaged valve seat, worn seals, high water pressure, or issues elsewhere in the plumbing system.
Call Lance Maxwell Plumbing Today
If your shower is leaking, difficult to control, or giving you more surprises than your morning coffee should, we are ready to help. As your trusted Jacksonville plumber, we proudly serve the Jacksonville and Orange Park areas with plumbing installation, repair, water heater installation, new construction plumbing, preventive maintenance, and more. With more than 31 years of experience, our friendly and knowledgeable staff will do whatever it takes to ensure every customer’s needs are met. We also offer high-quality plumbing products from respected brands like Delta, Kohler, and Moen, so you can feel confident in the parts and service you receive. With our on-call 24/7 availability, you can rest assured that our team will be there to resolve your plumbing issues, day or night. Contact us today, and one of our representatives will be glad to assist you in addressing your plumbing needs.