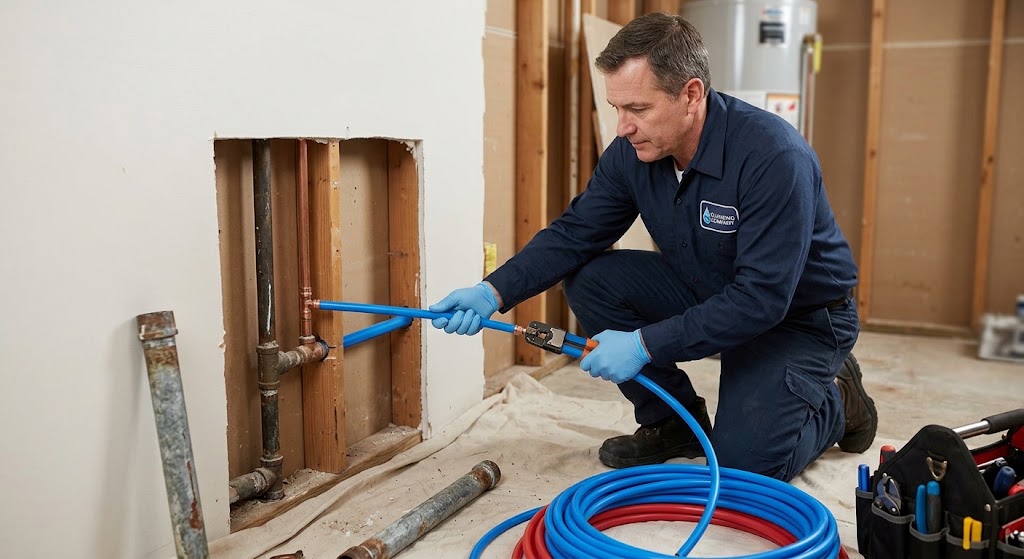
If you are wondering what to expect when repiping a house, the short answer is that most whole-home repiping projects take about one to three days, and you should expect some temporary interruptions to your water service along with limited access to certain rooms while the work is underway. Plumbers may need to open small sections of drywall to reach existing pipes and install new lines, but an experienced plumbing team will work strategically to keep disruption to a minimum. Your home may feel a little busier than usual for a few days, but a well-planned repipe should not turn your house into a construction zone for weeks on end.
Repiping can sound intimidating, especially when you picture pipes running behind nearly every wall in your home. Fortunately, the process is much more organized than many homeowners expect. Professional plumbers typically follow a carefully planned sequence that keeps the project moving efficiently while protecting your property and maintaining access to as much of your home as possible.
Understanding how the process works before the first pipe is removed can make the experience much easier. Here is what typically happens before, during, and immediately after a whole-home repipe.
Why Would a House Need Repiping?
Repiping involves replacing some or all of the water supply lines throughout a house. It may become necessary when the existing plumbing system has deteriorated, developed recurring leaks, or become unreliable due to age or material-related problems.
Some warning signs that may lead a plumber to recommend repiping include:
- Frequent plumbing leaks
- Discolored or rusty-looking water
- Unexplained changes in water pressure
- Corroded exposed pipes
- Persistent plumbing repairs in different parts of the house
- Water with an unusual metallic taste or odor
- Aging plumbing materials that are reaching the end of their expected service life
One isolated leak does not necessarily mean the entire house needs new plumbing. However, when leaks keep appearing in different locations, repairing one section at a time may no longer be the most practical approach.
A professional plumbing inspection can help determine whether targeted repairs or a more comprehensive repiping project makes sense.
Step 1: The Pre-Repipe Walkthrough
Before anyone starts opening walls or removing pipes, the plumbing contractor should perform a thorough walkthrough of the home.
This initial inspection is one of the most important parts of the project because it allows the plumber to understand how the existing plumbing system is laid out and determine the most efficient path for the replacement pipes.
During the walkthrough, the plumber may inspect areas such as:
- Kitchens
- Bathrooms
- Laundry rooms
- Utility rooms
- Garages
- Attics
- Crawl spaces
- Basements, when applicable
- Water heater connections
- Outdoor plumbing connections
The plumber will also determine where existing water supply lines enter and travel through the home.
In many houses, there may be more than one possible route for new piping. An experienced plumber will usually look for the route that provides reliable access while minimizing unnecessary wall openings.
This is also the time to discuss the expected schedule, pipe materials, water shutoff periods, drywall access, and any special circumstances involving your home.
If you have pets, children, a home office, or particular rooms that need to remain accessible, mention those concerns before work begins. A little planning can make the project considerably easier for everyone involved.
Step 2: Choosing Between PEX and Copper
One of the major decisions involved in a repiping project is the type of material used for the new water lines. Two common options are PEX and copper.
Each material has advantages, and the best choice may depend on the home’s layout, local plumbing requirements, budget, and homeowner preferences.
What Is PEX?
PEX, or cross-linked polyethylene, is a flexible piping material commonly used in residential plumbing.
Its flexibility makes it especially useful during repiping because plumbers can often route it through walls, ceilings, and other spaces with fewer fittings and potentially fewer access openings.
Advantages of PEX can include:
- Flexible installation
- Resistance to corrosion
- Fewer fittings in many installations
- Easier routing through existing structures
- Quiet operation
- Efficient installation
Because PEX can bend around certain obstacles, it may be particularly useful when working within an already finished home.
What About Copper?
Copper has been used in residential plumbing systems for decades and continues to be a trusted option for water supply lines.
Some homeowners prefer copper because of its long history in residential plumbing and its rigid construction.
Potential advantages include:
- Long-established plumbing material
- Excellent durability when installed in appropriate conditions
- Resistance to UV exposure
- Rigid and stable construction
- Familiarity among plumbing professionals
Copper installation can sometimes require more fittings and access than flexible PEX piping, depending on the layout of the home.
Neither material is automatically the right choice for every house. Your plumber should explain the practical differences based on your home’s plumbing system and installation requirements.
Step 3: Preparing the House for Repiping
Before the plumbing work starts, preparation can help make the project run smoothly.
Plumbers may ask you to clear areas beneath sinks, around plumbing fixtures, or near locations where access will be required.
You may also want to move:
- Furniture near expected work areas
- Fragile decorations
- Electronics close to plumbing access points
- Items stored under bathroom or kitchen sinks
- Belongings inside closets where pipes may be accessed
Professional plumbers typically use protective coverings to help shield flooring, counters, and furniture from construction dust and debris.
You usually do not need to empty your entire house. Think of it more as creating clear pathways so the plumbing crew can work efficiently.
If there is a stack of mystery boxes you have been meaning to move out of the hallway for the past three years, repiping may finally give you the motivation.
Step 4: The Water Is Shut Off
At some point, your water supply will need to be turned off so the existing plumbing can be disconnected and the new system installed.
The water is not necessarily off continuously for the entire project.
Experienced plumbers often organize the work so water service can be restored during portions of the project or at the end of each workday whenever possible.
However, homeowners should expect periods when sinks, toilets, showers, washing machines, and other water-dependent fixtures cannot be used.
Before work begins, ask your plumber approximately how long the water will be unavailable each day.
It can also help to fill several containers with water in advance for basic needs.
Step 5: Access Openings Are Made
One of the biggest concerns homeowners have about repiping is what happens to their walls.
Yes, some drywall openings are usually necessary.
Pipes often run inside walls and ceilings, so plumbers need a way to access those areas. However, professional repiping does not usually require removing huge sections of drywall throughout the home.
Instead, plumbers typically create carefully positioned access openings where needed.
The size and number of openings depend on factors such as:
- The layout of the house
- The location of existing pipes
- The type of new piping
- The number of plumbing fixtures
- Whether pipes can be routed through an attic or crawl space
- The number of floors in the home
PEX may allow for fewer access points in certain homes because of its flexibility.
The goal is generally to create enough access to install the new plumbing properly without opening more of the wall than necessary.
Step 6: The Old Plumbing Is Bypassed or Removed
Once access has been established, the plumbing team begins transitioning the house from the old water supply system to the new one.
Not every section of old plumbing necessarily needs to be physically pulled from the walls. In some situations, abandoned pipe may remain safely in place after being disconnected.
Removing every inch of unused piping could require unnecessary demolition.
Instead, plumbers often disconnect the old system and route new pipes through more practical locations.
The exact method depends on the plumbing design and condition of the existing system.
Step 7: New Water Lines Are Installed
Next comes the main portion of the project: installing the replacement plumbing.
New pipes are routed to fixtures and water-using appliances throughout the home.
These may include:
- Bathroom sinks
- Toilets
- Showers
- Bathtubs
- Kitchen sinks
- Dishwashers
- Refrigerators
- Washing machines
- Water heaters
- Outdoor hose connections
The plumber connects the new piping system according to the planned layout and applicable plumbing standards.
This stage requires careful installation because proper sizing, connections, routing, and support all affect how reliably the system operates.
How Long Does Repiping a House Take?
For many homes, the active plumbing portion of a repiping project can be completed in approximately one to three days.
However, there is no universal timeline.
Project length can vary based on:
- Square footage
- Number of bathrooms
- Number of stories
- Plumbing accessibility
- Pipe material
- Number of fixtures
- Home layout
- Condition of existing plumbing
- Unexpected issues discovered during installation
A small single-story home with easy attic access may move relatively quickly. A larger two-story home with complicated plumbing routes may require additional time.
Your plumbing contractor should provide a more specific estimate after inspecting the property.
What Daily Life Is Like During a Repipe
Most homeowners can remain in their homes while repiping work is being completed.
That does not mean everything will feel completely normal.
Expect technicians to move between different rooms, equipment to be brought into the house, and occasional construction noise.
You may also experience temporary water shutoffs.
If you work from home, it may be helpful to set up your workspace in an area away from the primary construction zones.
Pets should also be kept somewhere safe where they cannot wander into work areas or escape through doors as technicians enter and exit.
The disruption is temporary, and an organized plumbing team should communicate clearly about which areas of the house will be affected each day.
Step 8: The New Plumbing System Is Tested
Installing the pipe is not the end of the process.
Before walls are closed, the plumbing system should be thoroughly checked.
The plumbing team will generally inspect connections, evaluate the new system, and make sure water is flowing properly throughout the house.
Fixtures may be tested individually to confirm proper operation.
Testing before drywall repair is important for one obvious reason: if an adjustment needs to be made, it is much easier to do while the pipes are still accessible.
Nobody wants to patch a wall only to open it again the next morning.
Step 9: What Happens to the Drywall?
After the new plumbing has been installed and tested, the access openings in the walls and ceilings can be repaired.
Homeowners should confirm beforehand whether drywall repair is included in the plumbing contractor’s scope of work.
Depending on the contractor and project agreement, drywall may be repaired by the plumbing company, a separate contractor, or the homeowner’s preferred drywall professional.
Drywall repair typically involves:
- Replacing removed sections
- Securing drywall patches
- Applying joint compound
- Sanding repaired areas
- Preparing surfaces for finishing
Painting may or may not be included.
Discuss these details before the repiping begins so there are no surprises once the plumbing portion of the project is finished.
What You Can Do to Make Repiping Easier
Homeowners can take a few simple steps to make the process more convenient.
Before your project begins:
- Clear items from cabinets beneath sinks.
- Move valuables away from expected work areas.
- Keep pets secured.
- Ask when the water will be shut off.
- Make arrangements if you need uninterrupted water access.
- Confirm who handles drywall repair.
- Discuss the expected project schedule.
- Make sure technicians have access to necessary parts of the home.
Communication is one of the best ways to reduce stress during a repipe.
If you are unsure about something, ask. A professional plumbing company should be able to explain what is happening, what comes next, and how the work will affect your home.
What Happens After the Repipe Is Finished?
Once installation and testing are complete, your plumber should walk through the finished work with you.
This is a good opportunity to ask questions about the new plumbing system and learn whether there are any specific maintenance recommendations.
You may also receive information regarding the piping materials, fixtures, warranties, or other components installed during the project.
Keep any documentation associated with the repipe in a safe place along with your other home maintenance records.
Frequently Asked Questions About Repiping a House
Do I Have to Move Out While My House Is Being Repiped?
Usually, no. Many homeowners remain in their homes throughout the repiping process. You should expect workers in different areas of the house, temporary water shutoffs, and some construction noise.
Will Repiping Destroy My Walls?
Repiping usually requires some drywall access, but plumbers typically make targeted openings rather than removing entire walls. The amount of drywall work depends on where the pipes are located and how easily they can be accessed.
How Long Will My Water Be Turned Off?
Water shutoff periods vary depending on the project. In many cases, plumbers can limit the amount of time the water remains unavailable and may restore service at the end of the workday.
How Long Does Whole-House Repiping Usually Take?
Most straightforward residential repiping projects can often be completed in approximately one to three days. Larger or more complicated homes may take longer.
Is PEX Better Than Copper?
Both materials can be suitable for residential plumbing. PEX is flexible and often easier to route through finished homes, while copper is a durable, long-established plumbing material. Your plumber can recommend an option based on your home and project requirements.
Does All of the Old Pipe Have to Be Removed?
Not always. Some disconnected pipes can remain inside walls if removing them would create unnecessary damage. Your plumber will determine which sections should be removed or abandoned in place.
Will I Still Be Able to Use My Bathroom During the Project?
There may be periods when toilets, sinks, and showers cannot be used because the water supply is shut off. Your plumber should explain the expected daily schedule before work begins.
Is Drywall Repair Included With Repiping?
It depends on the plumbing company and project agreement. Ask before work begins whether drywall repair, finishing, and painting are included.
How Do I Know Whether My House Really Needs Repiping?
Frequent leaks, corrosion, water discoloration, pressure problems, and aging plumbing materials may indicate a larger issue. A professional plumber can inspect the system and determine whether individual repairs or whole-home repiping makes more sense.
Make Your Repiping Project Easier With Lance Maxwell Plumbing
Repiping your house may sound like a major undertaking, but the process is much easier to manage when you know what will happen and have an experienced plumbing team handling the work. From the initial walkthrough and material selection to installation, testing, and final inspection, careful planning can reduce disruption and keep the project moving efficiently.
When you need a trusted Jacksonville plumber, turn to Lance Maxwell Plumbing. We have more than 31 years of experience providing plumbing installation and repair services throughout the Jacksonville and Orange Park areas.
Our team offers a full line of plumbing services, from new construction applications and plumbing repairs to water heater installation and preventive maintenance. Our friendly and knowledgeable staff is committed to doing whatever it takes to make sure every customer’s plumbing needs are addressed properly.
Plumbing problems also have an inconvenient habit of ignoring business hours. That is why Lance Maxwell Plumbing offers on-call 24/7 availability. Whether you are dealing with a planned plumbing project or an unexpected problem in the middle of the night, our team is ready to help.
We also offer a full selection of high-quality plumbing products from trusted brands including Delta, Kohler, and Moen.
If you are experiencing recurring plumbing problems or believe it may be time to repipe your home, contact us today. One of our representatives will be happy to discuss your needs, answer your questions, and help you determine the right plumbing solution for your Jacksonville or Orange Park home.