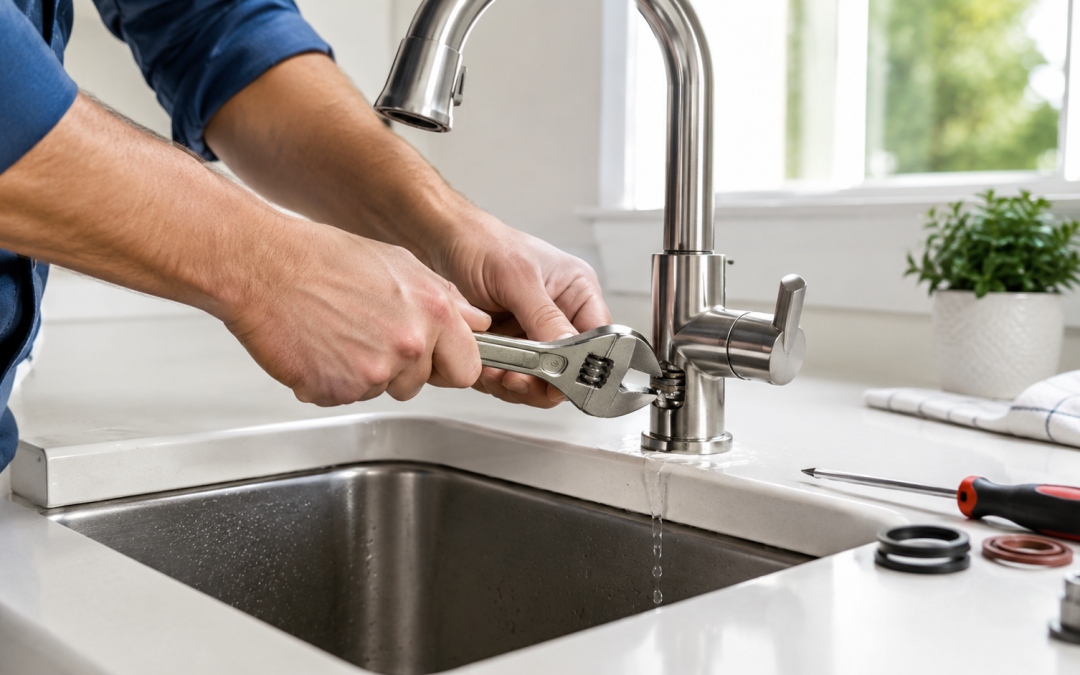
A dripping faucet might seem like a small annoyance, but learning how to fix a leaky faucet can save water, reduce utility bills, and restore a little peace and quiet to your home. That steady drip, drip, drip is not just testing your patience while you try to sleep. It can also waste gallons of water over time and may point to worn-out parts inside the faucet. The good news is that many faucet leaks are caused by simple issues, such as a worn washer, damaged O-ring, loose packing nut, or corroded valve seat. With the right tools, a careful approach, and a little patience, some homeowners can handle a basic faucet repair on their own.
Why a Leaky Faucet Should Not Be Ignored
A leaky faucet often starts as a minor inconvenience, but it can turn into a bigger problem if left alone. Even a slow drip can add up to a surprising amount of wasted water over the course of a month. That means your plumbing system is working harder than it needs to, and your water bill may slowly creep upward. In some cases, a leak can also cause staining around the sink, mineral buildup, or moisture damage to nearby cabinets and countertops. What begins as a tiny drip can eventually become a steady stream, and no one wants their faucet to develop a dramatic personality at 2 a.m.
Ignoring a leak can also make the eventual repair more difficult. When washers, seals, or cartridges continue to wear down, they may damage other internal faucet parts. Corrosion can spread, threads can strip, and components can become harder to remove. A quick repair today may prevent a more expensive faucet replacement later. That is why it is best to address a leaking faucet as soon as you notice the problem.
Common Reasons Faucets Leak
Before you begin taking anything apart, it helps to understand why faucets leak in the first place. Different faucet styles have different internal parts, but many leaks come from a handful of common issues. Identifying the likely cause can help you buy the right replacement parts and avoid unnecessary frustration. Most leaks are caused by normal wear and tear, especially in faucets that are used every day. Kitchen and bathroom faucets work hard, so it is only fair that their internal parts occasionally ask for retirement.
Common causes of faucet leaks include:
- Worn washers or seals
- Damaged O-rings
- Corroded valve seats
- Loose packing nuts
- Faulty cartridges
- Worn ceramic discs
- High water pressure
- Improperly installed faucet parts
A compression faucet, for example, often leaks because of a worn rubber washer. A cartridge faucet may leak because the cartridge is damaged or coated with mineral buildup. Ball faucets and ceramic disc faucets have their own internal parts that can fail over time. Knowing your faucet type is one of the most important first steps in fixing the leak correctly.
Tools and Supplies You May Need
Having the right tools nearby can make the job much smoother. Nothing interrupts a repair quite like realizing your wrench is in the garage, your replacement washer is the wrong size, or your flashlight has joined the witness protection program. Before you start, gather your supplies and set them near the sink. This will help you stay organized and reduce the risk of losing tiny screws or parts down the drain. It is also smart to take photos as you disassemble the faucet so you can remember how everything fits back together.
Useful tools and supplies may include:
- Adjustable wrench
- Phillips and flathead screwdrivers
- Allen wrench
- Needle-nose pliers
- Replacement washers, O-rings, or cartridges
- Plumber’s grease
- Towel or rag
- Small bowl for screws and parts
- Flashlight
- White vinegar for mineral buildup
- Manufacturer’s faucet manual, if available
You may not need every item on this list, but it is better to be prepared. If you are unsure what replacement part you need, remove the old part and take it to a hardware store for comparison. Matching faucet components by size and style is important because even a small difference can cause the leak to continue. If your faucet is made by a major brand such as Delta, Kohler, or Moen, replacement parts are often available through hardware stores, plumbing suppliers, or the manufacturer. When in doubt, calling a professional plumber can save time and prevent accidental damage.
Step 1: Turn Off the Water Supply
The first and most important step is to turn off the water supply. Look under the sink for the shutoff valves connected to the hot and cold water lines. Turn the valves clockwise until they stop. Once the water is turned off, open the faucet to release any remaining water and pressure in the lines. This step helps prevent surprise sprays, which are rarely funny when you are holding a wrench and standing in socks.
If the shutoff valves under the sink do not work or are stuck, you may need to turn off the main water supply to the home. Do not force old or corroded shutoff valves, since they can break and create a larger leak. If the valves are difficult to move, that may be a sign that it is time to have them replaced. Working on plumbing without fully shutting off the water can quickly turn a simple repair into a cleanup project. Make sure the water is off before you move forward.
Step 2: Cover the Drain and Protect the Sink
Before taking the faucet apart, cover the drain with a stopper or rag. Faucet repairs often involve small screws, clips, washers, and springs, and these parts seem to have a special talent for disappearing. Covering the drain keeps important pieces from falling into the plumbing. You should also place a towel in the sink basin to protect the finish from dropped tools. This small step can save both frustration and scratches.
It is also a good idea to clear the area around the sink. Remove soap dispensers, toothbrush holders, cleaning products, or anything else that may get in the way. Keep a small bowl or container nearby to hold parts in the order you remove them. If you are not familiar with faucet repair, take photos during each step. These photos can be extremely helpful when it is time to reassemble the faucet.
Step 3: Identify Your Faucet Type
Different faucet designs require different repair methods. The four most common faucet types are compression, cartridge, ball, and ceramic disc faucets. Compression faucets usually have separate hot and cold handles and rely on rubber washers to stop water flow. Cartridge faucets may have one or two handles and use a cartridge to control water flow and temperature. Ball faucets are common in single-handle designs and use a rotating ball mechanism. Ceramic disc faucets use two ceramic discs that move against each other to regulate water.
Identifying the faucet type helps you understand which parts may need replacement. A compression faucet with a drip from the spout often needs a new washer or valve seat repair. A cartridge faucet that leaks around the handle may need a new cartridge or O-ring. A ball faucet may require a repair kit with springs, seats, and seals. A ceramic disc faucet may need cleaning, new seals, or a full cartridge replacement.
Step 4: Remove the Faucet Handle
Once you know the faucet type, carefully remove the handle. Many faucet handles have a decorative cap that hides the screw. Use a flathead screwdriver to gently pry off the cap, then remove the screw with the correct screwdriver or Allen wrench. Pull the handle straight up or away from the faucet body. If it feels stuck, avoid forcing it too aggressively because older handles can crack or damage the stem.
After removing the handle, inspect the visible parts for corrosion, mineral buildup, or wear. In some cases, the leak may come from a loose packing nut beneath the handle. Tightening the nut slightly may stop the leak, but do not overtighten it. Too much force can damage the faucet or make the handle difficult to turn. If tightening does not solve the issue, continue disassembling the faucet to inspect the internal components.
Step 5: Replace Worn Washers, O-Rings, or Cartridges
For a compression faucet, remove the stem and inspect the washer at the bottom. If the washer looks cracked, flattened, stiff, or worn, replace it with an exact match. Apply a small amount of plumber’s grease before reinstalling the part. Also, check the valve seat, which is the area where the washer presses down to stop water flow. If the valve seat is corroded or rough, it may need cleaning, resurfacing, or replacement.
For a cartridge faucet, remove the retaining clip or nut and pull out the cartridge. Make sure you note the cartridge’s orientation before removing it. Insert the new cartridge in the same direction, then secure it with the clip or nut. For ball faucets, use a faucet repair kit designed for your specific model and replace the seats, springs, and seals. For ceramic disc faucets, remove the cylinder and inspect the seals, then clean mineral deposits with vinegar if needed.
Step 6: Clean Mineral Buildup
Hard water can leave mineral deposits inside faucets, especially in areas where water contains higher levels of calcium and magnesium. These deposits can interfere with seals and moving parts, causing drips or reducing water flow. If you see white, chalky buildup, soak removable parts in white vinegar for a short time. Gently scrub them with a soft brush or cloth before reinstalling. Avoid using harsh tools that can scratch or damage precision faucet parts.
Cleaning mineral buildup is especially helpful for aerators and ceramic disc faucets. The aerator is the small screen at the end of the faucet spout, and it can become clogged over time. Remove it carefully, rinse it, and soak it in vinegar if needed. A clean aerator can improve water flow and help the faucet perform better. If the aerator is damaged or heavily clogged, replacing it is usually inexpensive.
Step 7: Reassemble the Faucet
Once the worn or damaged parts have been replaced, reassemble the faucet in the reverse order. Make sure every part is seated properly and tightened securely. Avoid overtightening screws or nuts, since this can damage threads, crack parts, or create new leaks. Use your photos as a guide if you took them during disassembly. The goal is to put everything back together snugly, not to prove you are stronger than the faucet.
After the handle is back in place, turn the water supply valves on slowly. Watch carefully for leaks around the handle, base, and spout. Let the water run for a few moments, then turn it off and check again for dripping. If the leak is gone, congratulations, you have successfully handled a common household plumbing repair. If the leak continues, there may be another worn part or a deeper issue inside the faucet.
When to Call a Professional Plumber
Some faucet leaks are simple, but others require professional attention. If you have replaced the basic parts and the faucet still leaks, the issue may involve corrosion, damaged plumbing connections, or a faucet body that needs replacement. You should also call a plumber if shutoff valves are stuck, water lines are leaking, or you are uncomfortable taking the faucet apart. Plumbing repairs can become expensive when small problems are accidentally made worse. A professional can quickly diagnose the issue and recommend the most reliable solution.
You should consider calling a plumber if:
- The leak continues after replacing washers or cartridges
- The faucet is old, corroded, or difficult to disassemble
- Water is leaking under the sink
- Shutoff valves do not work
- You see signs of cabinet or wall damage
- Water pressure seems unusually high
- You are replacing the faucet entirely
- You want the repair done quickly and correctly
Calling a professional is not admitting defeat. It is choosing the right tool for the job, and sometimes that tool is an experienced plumber with the proper equipment. A trained plumber can also inspect related plumbing components and help prevent future leaks. This is especially helpful if you have multiple fixtures showing signs of wear. One small leak may be part of a larger plumbing maintenance need.
Tips to Prevent Future Faucet Leaks
Preventing faucet leaks starts with regular maintenance and gentle use. Avoid turning faucet handles too tightly, especially on compression faucets. Once the water is off, forcing the handle farther can wear out the washers faster. Clean aerators periodically to reduce mineral buildup and maintain good water flow. If you notice stiffness, squeaking, or reduced water pressure, address it early before parts fail completely.
You can also protect your plumbing by paying attention to water pressure. High water pressure can strain faucets, supply lines, valves, and water heaters. If your home’s water pressure is too high, a plumber may recommend a pressure-reducing valve. Scheduling preventive plumbing maintenance can also help catch issues before they become emergencies. A little attention now can save you from a much bigger repair later.
FAQ
What is the most common cause of a leaky faucet?
The most common cause is a worn washer, seal, O-ring, or cartridge. These parts wear down over time from regular use. Replacing the damaged part often stops the leak. The exact part depends on the type of faucet you have.
Can I fix a leaky faucet myself?
Many basic faucet leaks can be fixed by a careful homeowner with the right tools and replacement parts. However, you should call a plumber if the faucet is corroded, the shutoff valves do not work, or the leak continues after basic repairs. It is better to get professional help than risk damaging the fixture or plumbing connections.
How much water does a dripping faucet waste?
A dripping faucet can waste a significant amount of water over time, especially if it drips continuously day and night. The faster the drip, the more water and money are wasted. Repairing the leak promptly helps conserve water and may lower your monthly utility bill.
Why is my faucet leaking from the handle?
A leak around the handle is often caused by a worn O-ring, loose packing nut, or damaged cartridge. Tightening the packing nut may help in some cases. If that does not work, the internal seals or cartridge may need to be replaced.
Why does my faucet still leak after replacing the washer?
If a faucet still leaks after replacing the washer, the valve seat may be corroded or damaged. The replacement washer may also be the wrong size or installed incorrectly. In some cases, additional parts inside the faucet may be worn and need replacement.
Is it better to repair or replace a leaky faucet?
It depends on the faucet’s age, condition, and the cost of replacement parts. A newer, high-quality faucet is often worth repairing. An older faucet with corrosion, repeated leaks, or outdated parts may be better replaced. A plumber can help you decide which option makes the most sense.
Call Lance Maxwell Plumbing for Reliable Faucet Repair
Fixing a leaky faucet can be a manageable home repair, but not every leak is simple. When you need help from a trusted Jacksonville plumber, turn to Lance Maxwell Plumbing. With more than 31 years of experience serving the Jacksonville and Orange Park areas, we provide dependable plumbing installation and repair services for homes, businesses, new construction applications, water heater installation, preventive maintenance, and more. Our friendly and knowledgeable staff will do whatever it takes to ensure every customer’s needs are met, and our on-call 24/7 availability means help is available day or night. We also offer high-quality plumbing products from trusted brands like Delta, Kohler, and Moen, so you can feel confident in the performance and durability of your plumbing fixtures. Contact us today, and one of our representatives will be glad to assist you with your faucet repair, plumbing maintenance, or installation needs.