
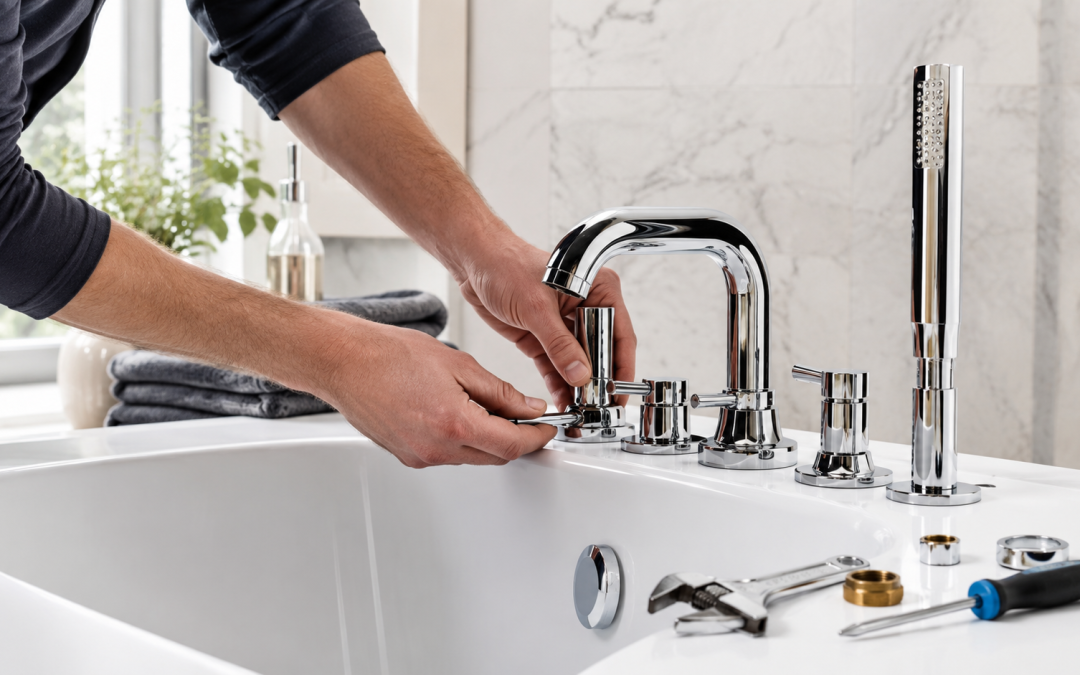
That slow drip from the tub spout that keeps you awake, or the corroded chrome handle that makes your bathroom look like it belongs in a different decade: those aren’t small annoyances. They wear you down. They are the kind of headaches that build into a permanent fixture on your mental to-do list, and the longer they sit there, the more daunting they get. Replacing a bathtub faucet is a project you can handle yourself with basic tools and a clear plan. Where folks usually run into trouble isn’t the actual installation: it’s skipping the diagnostic steps upfront, or pushing through warning signs that the job has grown beyond a simple swap. With the right approach, you can identify your spout, gather your tools, and complete this upgrade safely.
Understanding Your Bathtub Faucet Setup
Before you buy a single part or pick up a wrench, you need to know what you are working with. Take a close look first. Misidentifying your spout attachment type is the most common reason folks end up standing in the plumbing aisle holding the wrong hardware.
Identifying Your Spout Attachment Type
Tub spouts attach to the water supply pipe in one of two ways. Slip-on spouts slide over a smooth copper pipe stub and are locked in place with a small set screw, usually a hex screw, located on the underside of the spout near the wall. Threaded spouts, by contrast, screw directly onto a threaded pipe nipple protruding from the wall, with no screw visible underneath.
To figure out which type you have, crouch down and look at the underside of the spout where it meets the wall. A small slot or opening with a hex-head screw inside means you have a slip-on model. No slot, no screw, and a spout that sits flush against the wall tile almost certainly means it is threaded. This difference matters before you ever set foot in a plumbing supply store: a slip-on spout won’t thread onto a nipple, and a threaded spout won’t grip a smooth copper pipe no matter how hard you tighten the set screw.
Pipe clearance is another variable worth measuring. Slip-on spouts require a specific copper pipe stub length to grip properly, and most manufacturers specify this in their installation instructions. Measure the exposed pipe length before purchasing a replacement so the new spout sits flush against the wall without a gap.
Navigating Residential Plumbing Standards
While swapping a spout is mostly cosmetic work, touching the valve body behind the wall is a completely different story. That is where building codes become directly relevant to what you buy and how you install it.
Under the Florida Building Code Education Document, shower and tub-shower combination valves must be balanced pressure, thermostatic, or combination balanced pressure/thermostatic valves conforming to ASSE 1016 or CSA B125 standards. These aren’t suggestions; they are the baseline for any valve that controls water temperature in a residential tub or shower. The same code requires that these valves, along with master thermostatic mixing valves, feature a mechanism to limit the maximum water temperature setting to 120°F (49°C). That limit must be field-adjusted during installation per the manufacturer’s instructions, which means it is something a licensed master plumber verifies on the job, not something that comes pre-set from the factory.
One point that might surprise you: residential tubs and showers are specifically excluded from the requirement for individual shutoff valves under the Florida Building Code. That means your tub almost certainly doesn’t have a dedicated shutoff nearby; you will be working from the main water shutoff for the house. Knowing that before you start saves a frantic search once the water is off.
The code also mandates that all potable water fixture fittings be third-party certified. When you are shopping for a replacement spout or valve, look for products that carry NSF, IAPMO, or similar third-party certification marks. A bargain-bin fixture without certification markings isn’t just a quality risk: it may not pass a municipal inspection if your project ever involves permitted work.
Why DIY Bathtub Faucet Replacement Requires Caution
Most tub spout swaps go smoothly. Some don’t, and the difference between a two-hour project and a three-day water damage cleanup job often comes down to what is hiding behind the tile.
Risks of Pipe Damage in Older Homes
Homes in Northeast Florida, particularly older neighborhoods in Jacksonville and Orange Park, frequently have copper or galvanized steel supply lines that have been in service for decades. Galvanized pipe corrodes from the inside out, and copper develops a stubborn oxide layer at threaded connections over time. From the outside, the spout may look fine. The connection behind it may be fused solid. That spells trouble.
The danger is what happens when you apply torque to a seized spout. If the spout doesn’t turn freely, the force transfers down the pipe nipple and into the supply line inside the wall cavity. Copper pipe is relatively soft, and a twisted or snapped supply line inside the wall means water spraying into the wall cavity the moment you restore pressure, a situation that escalates from a DIY project into an emergency call within minutes.
White, crusty mineral deposits around the base of the spout or on the pipe stub are a reliable indicator that the connection has been under stress for a long time. Scale buildup of that kind signals that the threads or the pipe surface may be compromised. If you see it, treat the removal as a delicate operation, not a quick unscrew.
The Financial Impact of Hidden Leaks
A slow leak behind the wall doesn’t announce itself immediately. Water migrates through drywall, into insulation, and along framing members before it shows up as a stain on the ceiling below or a soft spot in the floor. By the time visible damage appears, mold has often already established itself in the wall cavity, and mold remediation in a bathroom wall is neither cheap nor quick.
Framing this as a cost calculation: professional installation of a tub faucet is a known, predictable expense, whereas water damage repair, subfloor replacement, and mold remediation can easily cost thousands. If you have ever navigated a hidden leak repair, you probably have a very different perspective on the value of getting the installation right the first time.
Older pipe systems sometimes show deterioration that goes well beyond a single corroded spout connection. If your home has aging galvanized or polybutylene supply lines, a faucet replacement project can be the moment you discover a much larger issue. Knowing the signs you need repiping before you start gives you a baseline for evaluating what you find when the spout comes off.
- Severe water damage to drywall and subflooring from hidden in-wall leaks
- Toxic mold growth behind the shower wall that requires professional remediation to address safely
- Snapped or twisted copper supply lines that turn a cosmetic swap into an emergency plumbing repair
- Voided manufacturer warranties resulting from improper installation or overtightening of fittings
If you are in the Jacksonville, Clay County, or Duval County area and feel a bit uneasy about what is hiding behind your tub wall, your local neighbors at Lance Maxwell Plumbing are here to help. Our team is available 24/7; reach us at (904) 209-9103 or schedule through our plumbing services in Jacksonville page. A professional assessment before you start is far less disruptive than an emergency call after something goes wrong.
Essential Tools and Materials for the Job
Gathering everything before the water goes off is not optional. Do not skip this step. Once the main shutoff is closed, you are on the clock: every minute you spend hunting for a tool is a minute your household is without water.
Basic Tools for Faucet Removal and Installation
An adjustable wrench handles threaded spout removal and installation. Channel-lock pliers give you grip on stubborn fittings, though they should never touch a finished surface directly. An Allen wrench, typically 1/8 inch, though this varies by manufacturer, is what you will need for the set screw on a slip-on spout. A standard flat-head or Phillips screwdriver handles any decorative trim screws on handle assemblies.
The detail most people skip: wrap a clean rag or microfiber cloth around the spout before applying any tool to it. Chrome and brushed nickel finishes scratch easily, and deep tool marks on a brand-new fixture are permanent. The rag takes two seconds to grab and saves you from having to explain to yourself why you are looking at a scratched spout you just installed.
Supplies and Sealants for a Leak-Free Fit
PTFE tape, commonly called plumber’s tape or Teflon tape, is what creates a watertight seal on threaded connections. It is inexpensive, and skipping it on a threaded spout is a reliable path to a slow drip at the wall connection. Silicone caulk goes around the base of the spout after installation to prevent water from migrating behind the tile and into the wall cavity. Use 100% silicone rated for bathroom use, not latex caulk, which doesn’t hold up against the moisture exposure a tub surround sees daily.
Overtightening is a genuine risk that doesn’t get enough attention in DIY guides. Plastic cartridges can crack under excessive torque, and brass fittings are easy to strip. The correct approach for most spout connections is hand-tight plus a controlled final turn with a tool, not maximum force. Gaskets and O-rings do the sealing work on many valve components: they compress to form a seal, and crushing them with overtightening defeats their purpose.
Proper preparation for a bathtub faucet installation starts well before the first tool touches the wall. Lay out every item on the checklist below before shutting off the main water supply. Scrambling for an Allen wrench with wet hands while the clock is running is the kind of avoidable stress that turns a calm project into a frustrating one.
PTFE tape application has a direction that matters: wrap it clockwise around the male threads, looking from the end of the pipe outward. Wrapping counterclockwise means the tape unravels as you thread the spout on, which defeats the purpose entirely. Three to four overlapping passes is sufficient: more than that and the spout may not thread on fully. For decorative trim components and cartridge retaining nuts, rely on the manufacturer’s specified torque or the feel of firm resistance rather than maximum effort. Many cartridge housings are plastic, and a cracked cartridge body means replacing the entire valve assembly, not just the spout.
- Adjustable wrench (for threaded spouts)
- Allen wrench / hex key (usually 1/8 inch, for slip-on spouts)
- PTFE (Teflon) pipe thread tape
- 100% silicone bathroom caulk
- Clean rag or microfiber cloth (to protect finishes)
- Utility knife (to scrape away old caulk)
Step-by-Step Guide to Removing the Old Faucet
Shutting Off the Water Supply Safely
As noted earlier, residential tubs don’t have individual shutoff valves under the Florida Building Code: you will be working from the main water shutoff for the house. Locate it before you start; in most Florida homes it is near the water meter at the street or at the utility connection point on the exterior wall. Turn it fully clockwise until it stops.
With the main supply off, open the lowest faucet in the house, like a laundry sink or a hose bib near the foundation, to drain residual pressure from the lines. This step prevents a surprising burst of water when you disconnect the spout. Before you do anything else, drop a rag or a small towel over the tub drain. Set screws, Allen wrenches, and small washers have a strange ability to find their way into open drains, and retrieving them is a detour you don’t need.
Detaching the Old Spout Without Damaging the Pipe
For a slip-on spout, look underneath for the set screw access slot. Insert the correct Allen wrench and turn counterclockwise to loosen: don’t remove the screw entirely, just back it off enough that the spout slides freely. Then pull the spout straight out from the wall. It should come off with steady, even pressure. If it doesn’t move, check that the screw is fully disengaged before applying more force.
For a threaded spout, grip it firmly with a rag-wrapped adjustable wrench and turn counterclockwise. The first movement is usually the hardest: once the threads break free, the rest unwinds quickly. Before either type comes fully off, run a utility knife along the caulk line where the spout base meets the wall tile. Old silicone caulk can bond aggressively to tile, and pulling the spout off without cutting through it can chip the tile surface or pull the grout loose.
Patience matters more than strength during removal. If the spout doesn’t respond to moderate, steady pressure, whether you are loosening a set screw or turning a threaded connection, stop and assess before escalating force. A spout that won’t move with reasonable effort is telling you something about the condition of the connection behind it. Applying excessive torque to a seized threaded spout can twist the copper pipe nipple inside the wall, and once that happens, the scope of the project changes dramatically. Water spraying inside a wall cavity is not a situation that waits for a scheduled appointment.
If you encounter heavy mineral scale, a spout that won’t move, or any sign that the copper nipple is twisting rather than the spout turning, it is time to stop. Your local neighbors at Lance Maxwell Plumbing are available 24/7 for exactly this situation. Call us at (904) 209-9103 for immediate assistance in Orange Park, Jacksonville, and Middleburg. Forcing a seized connection is how a quick spout replacement turns into a major wall-opening repair.
How to Install Your New Bathtub Faucet Spout
With the old spout off and the pipe stub exposed, take a moment to inspect what you are working with. Look for corrosion, cracks, or any damage in the pipe or threads before proceeding.
Mounting a Slip-On Tub Spout
First, clean the copper pipe stub thoroughly to remove any debris. Use a rag to wipe away any old caulk residue, mineral deposits, or debris: the spout needs to slide cleanly over the pipe without catching on anything. Slide the new spout over the pipe, pushing it toward the wall until the back of the spout sits flush against the tile surface. Confirm that the set screw hole on the underside of the spout aligns with the pipe, then insert the Allen wrench and tighten the set screw clockwise until it grips the pipe firmly. You are aiming for secure, not stripped; the screw should feel snug with resistance, not spinning freely or requiring extreme force. Once the spout is locked in place, run a bead of 100% silicone caulk around the base where the spout meets the tile, smooth it with a dampened finger, and allow it to cure per the manufacturer’s instructions before running water.
Installing a Threaded Tub Spout
Start by cleaning the threads on the pipe nipple. Remove any remnants of old PTFE tape with your fingers or a small brush. Wrap fresh PTFE tape clockwise around the male threads, three to four passes, overlapping slightly, then press the tape into the thread grooves with your thumb so it seats properly. Thread the new spout onto the nipple by hand, turning clockwise, until it is snug. At this point the spout may not be perfectly aligned vertically; that’s expected. Use a rag-wrapped adjustable wrench to give it a final quarter-turn, bringing the spout to its correct downward-facing position. Avoid going past vertical alignment: overtightening a threaded spout to chase perfect alignment can crack the spout body or damage the pipe threads. Finish with a silicone caulk bead around the base. Let it dry completely.
- For Slip-On Spouts: Clean the copper pipe → Slide the spout flush against the wall → Tighten the underside set screw → Apply silicone caulk around the base.
- For Threaded Spouts: Clean the pipe threads → Apply PTFE tape clockwise → Screw the spout on clockwise by hand → Align vertically with a final quarter-turn → Apply silicone caulk around the base.
Once the spout is installed and the caulk has had time to set, restore the main water supply slowly: open the shutoff valve gradually rather than snapping it fully open. Watch the base of the spout for any seepage as pressure builds. A small drip at the wall connection on a threaded spout usually means the PTFE tape wasn’t seated fully or the spout needs another quarter-turn. A drip from the set screw area on a slip-on spout means the screw needs a bit more tightening.
Temperature adjustment is worth addressing if you have also replaced or disturbed the valve cartridge during this project. The Florida Building Code requires that shower and tub-shower combination valves feature a temperature-limiting mechanism set to a maximum of 120°F (49°C), field-adjusted per the manufacturer’s instructions. Most modern pressure-balanced cartridges have a rotational limit stop, a small plastic tab or collar that restricts how far the handle turns toward the hot side, keeping you safe from accidental burns. If your new valve runs hotter than expected, consult the manufacturer’s instructions for adjusting this stop before regular use.
Frequently Asked Questions About Bathtub Faucet Installation
Troubleshooting and Common Installation Queries
Post-installation drips, questions about shutoff valves, temperature limits, and drain specifications are the issues we hear about most often from folks tackling this project. The answers below draw directly from the Florida Building Code and decades of hands-on experience in local neighborhoods.
How do I fix a dripping bathtub faucet after installation?
A drip that develops after a spout replacement almost always starts inside the valve body, not at the spout itself. The most common culprits are a worn cartridge or a damaged O-ring that wasn’t replaced during the project. The spout is downstream of the valve: if water is getting past the valve seat when the handle is off, a new spout won’t change that.
Do residential tubs and showers require individual shutoff valves?
The short answer is no. Under the Florida Building Code, residential tubs and showers are specifically excluded from the requirement for individual shutoff valves. This is a consistent standard that has been maintained across multiple code revisions. That said, a functional main water shutoff for the house is essential before starting any DIY plumbing work: it is the only way to isolate the water supply to the tub during installation.
What is the maximum safe water temperature for a bathtub faucet?
The Florida Building Code requires that shower and tub-shower combination valves, as well as master thermostatic mixing valves, include a mechanism to limit the maximum water temperature setting to 120°F (49°C). This limit is specifically intended to prevent scalding and must be field-adjusted during installation in accordance with the manufacturer’s instructions. If you have replaced a valve cartridge and the water runs hotter than expected, adjusting the rotational limit stop on the cartridge is the correct fix, not simply turning down the water heater, which affects every fixture in the house.
What size drain trap does a standard bathtub require?
A standard bathtub, with or without an overhead shower or whirlpool attachments, carries a drainage fixture unit value of 2 and requires a minimum trap size of 1½ inches under the Florida Building Code. Adding an overhead showerhead or a whirlpool system to the tub does not increase that drainage fixture unit value. This is relevant if you are doing any drain work alongside a faucet replacement, or if you are planning a bathroom renovation that involves moving the drain location.
How do I know if my tub spout is slip-on or threaded?
Look underneath the spout near the wall. A small slot with a hex or Allen screw inside means it’s a slip-on model: the screw is what holds it to the copper pipe stub. No slot, no screw, and a spout that sits tight against the wall tile without any visible fastener means it threads directly onto a pipe nipple. When in doubt, try to rotate the spout by hand with moderate pressure; a threaded spout will turn (or resist turning) as a unit, while a slip-on spout will stay fixed until the set screw is loosened.
Replacing a bathtub faucet is one of those satisfying weekend projects when everything goes smoothly. A shiny new spout and a clean seal can really dress up your bathroom without the mess of a full remodel. Cosmetic swaps are definitely something you can handle with a little preparation. But the picture changes when you run into old pipes, seized connections, or have to work on the valve behind the wall. Those situations carry a real risk of water damage, and a mistake there can get incredibly expensive. Your local neighbors at Lance Maxwell Plumbing have been helping families in Orange Park, Jacksonville, and Middleburg since 1994, and we are always here to step in when a simple job gets complicated.
When to Call a Professional Plumber
Some bathtub faucet installations are straightforward, but others require professional help. If your plumbing is old, corroded, leaking, or difficult to access, calling a plumber is the safer choice. You should also call a professional if the pipe behind the wall moves when you try to remove the old faucet. Movement can indicate a loose connection, which may break if too much force is applied. A broken pipe inside the wall is a problem no homeowner wants to discover the hard way.
Professional installation is also recommended for deck-mounted faucets, custom tubs, freestanding tubs, and installations that require valve replacement. These jobs often involve working in tight spaces and making precise connections. A licensed plumber can confirm compatibility, protect surrounding surfaces, and test the system properly. While DIY can be rewarding, there is no shame in handing the wrench to someone who uses one all day. Sometimes the smartest tool in the toolbox is knowing when to call for help.
Call Lance Maxwell Plumbing for Bathtub Faucet Installation and More
If you need help installing a bathtub faucet or want the peace of mind that comes with professional service, contact us at Lance Maxwell Plumbing, your trusted Jacksonville plumber. With more than 31 years of experience, we proudly provide the Jacksonville and Orange Park areas with dependable plumbing installation and repair services. Our team offers a full line of plumbing solutions, from new construction applications and water heater installation to preventive maintenance and everyday plumbing repairs. We also offer high-quality plumbing products from trusted brands like Delta, Kohler, and Moen, so your home receives fixtures built for lasting performance.
At Lance Maxwell Plumbing, our friendly and knowledgeable staff will do whatever it takes to ensure every customer’s needs are met. With on-call 24/7 availability, you can rest assured that our team will be there to resolve your plumbing issues, day or night. Whether your bathtub faucet is leaking, outdated, improperly installed, or ready for an upgrade, we are here to help. Contact us today, and one of our representatives will be glad to assist you in addressing your plumbing needs.