
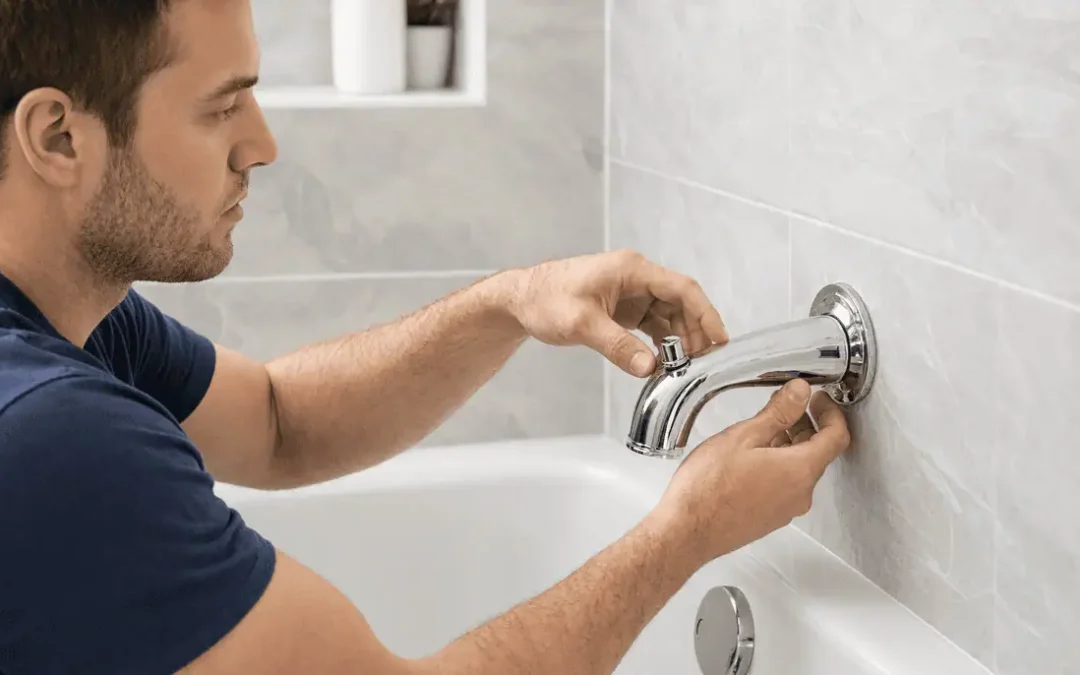
Your Neighbor the Master Plumber’s Guide to Replacing a Bathtub Faucet
That slow, rhythmic drip from your tub faucet has a way of getting louder at 2 a.m. than it ever does during the day. And if you’ve already checked your water bill and winced, you already know a worn-out bathtub faucet isn’t a problem that fixes itself. Water waste adds up fast. That dripping faucet is like a tiny leak in a boat: ignore it long enough, and you have a much bigger problem on your hands. Luckily, replacing it is well within reach for a capable DIYer, but it’s the kind of project where knowing the code requirements and material standards upfront saves you from a much bigger headache down the road.
Doing the job right means choosing compliant materials, making watertight connections, and removing the old hardware without cracking your pipes. Where the work gets risky, like with corroded pipes, seized fittings, or behind-the-wall plumbing, we’ll tell you plainly so you can decide whether to push forward or call in a licensed master plumber.
Understanding Bathtub Fixtures vs. Fixture Fittings
Before you pick up a wrench, it helps to understand exactly what you’re working with under the Uniform Plumbing Code. Here in Jacksonville, we see all kinds of older homes with unique setups. A plumbing fixture is a permanent piece of equipment secured to a building’s wall or floor: your bathtub, your shower pan, or your sink, which stays with the property when it’s sold. Fixture fittings, by contrast, are the objects mounted onto those fixtures or walls: the faucets, handles, and valves that control water flow. When you replace a bathtub faucet, you’re replacing fixture fittings, not the fixture itself. That difference matters because the code treats them differently in terms of material standards, backflow prevention, and installation requirements.
Your bathtub faucet does a lot of heavy lifting. Nobody likes a freezing cold shower, but a malfunctioning fixture fitting can ruin your morning routine fast. Plumbing codes governing these fittings exist for a specific reason: protecting the potable water supply from contamination. Every connection you make to your home’s water lines is a potential pathway for wastewater or non-potable substances to migrate back into the supply if the fittings aren’t properly installed or don’t meet minimum standards. That’s not an abstract concern: it’s the reason backflow prevention requirements and material certifications exist in the first place.
Before disassembling anything, you need to understand the internal component at the center of your faucet’s operation: the valve cartridge. The cartridge governs the mix of hot and cold water and, in most cases, is the first thing to fail when a faucet starts dripping. If your tub is leaking rather than running full-on, you may not need to replace the entire faucet assembly; you may only need to replace a faucet cartridge. Understanding whether you’re dealing with a cartridge failure versus a failed spout or valve body will determine how far you need to take the disassembly. Check this first.
One code requirement that surprises many homeowners: under Section 606.2 of the Florida Plumbing Code, residential bathtubs and showers are explicitly exempt from the requirement for individual shutoff valves. Most fixtures in your home, like toilets, sinks, and washing machines, have a dedicated shutoff valve right there under or behind them. Your tub almost certainly does not. That means before you loosen a single fitting, you need to shut off the main water supply to the entire house, either at the curb shutoff or at the building’s main entrance valve. Skipping this step because you assume there’s a local valve behind the wall is how a routine faucet swap turns into a flooded bathroom.
Choosing the Right Standards and Materials for Your Tub
All new bathtub faucets and fixture fittings must comply with ASME A112.18.1 / CSA B125.1. That standard covers dimensional requirements, flow rates, and, critically, backflow prevention. Faucets must include either an airgap or a vacuum breaker on pullout-type fittings to prevent household water from being contaminated by siphoning. Beyond the faucet itself, every valve and fitting that supplies potable water must meet the NSF 61 standard for toxicity and material safety. The good news is that finding a compliant faucet is simple once you know what to look for. When you’re shopping for a replacement faucet, look for both certifications on the packaging; if neither is listed, that fixture has no business going into your home’s water supply.
For homeowners in Northeast Florida, including Orange Park, Middleburg, and Jacksonville, hard water is a real headache. Mineral scale accumulates inside fittings faster than in softer-water regions, which means older fixtures may be more corroded internally than they appear from the outside. If your home draws from an individual well system rather than municipal supply, the water quality must meet Florida Statute 373 and carry approval from the local health authority before it’s used in any bathing fixture. That’s not a formality; well water chemistry directly affects how quickly your new fittings will degrade. It ruins metal fast.
Matching your new faucet to your existing plumbing setup matters more than most product descriptions suggest. Forcing a faucet body designed for one pipe configuration onto a different one, like the wrong thread pitch, wrong pipe diameter, or wrong spout reach, creates stress points at the connection that may not leak immediately but will eventually. Leaks behind the wall are among the most expensive plumbing repairs a homeowner can face, because by the time you notice them, the damage to framing and drywall is already done. Using unapproved materials or joint methods is also strictly prohibited under the plumbing code, and for good reason: an improper connection doesn’t just risk a leak, it can compromise the integrity of the entire water supply line.
The following connection methods are prohibited under the Florida Plumbing Code and must be avoided entirely:
- Cement or concrete joints are strictly prohibited.
- Unapproved fittings and saddle-type fittings are not allowed.
- Solvent-cementing different types of plastic pipe together is prohibited, such as using PVC cement on CPVC or vice versa.
If you are unsure whether your shutoff situation is code-compliant or worried about what is behind your tub wall, give your local neighbors a call. We’ve been keeping Orange Park families comfortable since the ’90s, and we are on call 24/7. Whether you need a quick consultation or a full faucet installation, call us at (904) 209-9103.
Approved Piping and Joint Methods for a Watertight Seal
The joint method you use depends entirely on what pipe material you’re working with, and getting it wrong is one of the most common sources of post-installation leaks. For copper lines, which are still common in homes built before the 1990s, connections must be reamed to their full inside diameter, cleaned, and soldered using lead-free solder containing no more than 0.2% lead, conforming to ASTM B 32, with flux conforming to ASTM B 813. That 0.2% threshold isn’t arbitrary; it’s the point at which lead contamination of drinking water becomes a measurable health risk. Threaded connections on any material must conform to ASME or ASTM standards, and pipe-joint compound or tape goes on male threads only, never female.
For plastic piping, the rules split by material. Each type behaves differently. CPVC joints require clean, dry surfaces and orange solvent cement conforming to ASTM F493. A primer is only optional if you’re using a yellow, third-party certified ASTM F493 solvent cement on pipes between 1/2 inch and 2 inches in diameter. PVC joints are more strict: they require a purple primer conforming to ASTM F 656 before the solvent cement (ASTM D 2564) goes on. Skipping the primer on PVC is a common shortcut that produces joints that hold fine for months and then fail without warning.
Where you’re connecting copper to galvanized steel, which is a situation you’ll encounter in older homes that have had partial repiping over the years, you must use a brass fitting or a dielectric union conforming to ASSE 1079. Direct copper-to-galvanized contact accelerates galvanic corrosion at the joint, and the resulting degradation can eat through the connection in a fraction of the time either metal would last on its own.
[Inline Image]PLACEHOLDER Close-up, high-quality photograph of a code-compliant copper pipe joint showing clean, lead-free solder connections, alongside a dielectric union connecting copper to galvanized steel pipe. Sharp detail, warm workshop lighting, neutral background. Realistic, instructional photography style.[/Inline Image] Alt text: Code-compliant copper pipe joint and dielectric union for a bathtub faucet replacement.Using the correct, code-approved joint method is the only reliable way to guarantee a watertight seal that holds under continuous water pressure. In older Clay County homes especially, the pipe material you’re connecting to may be brittle or partially corroded, which means the joint itself carries more of the structural load than it would in newer construction. If you’re dealing with a home that has a patchwork of pipe materials from different eras, it’s worth reading up on modern repiping materials before committing to a connection method; the wrong choice can devalue the repair before the caulk dries.
Flexible water connectors deserve specific attention. Any flexible connector exposed to continuous water pressure must conform to ASME A112.18.6, and it must remain accessible for future maintenance, meaning you can’t bury it behind a permanently sealed wall. If your installation requires routing a flexible connector through a space that won’t have an access panel, you need to either reconfigure the run or install access before closing the wall.
For a standard bathtub faucet replacement, you’ll need the following tools and materials on hand before you start:
- Hex keys or Allen wrench: for removing the old bathtub faucet handle and any set screws on the spout
- Screwdriver: both flathead and Phillips, depending on your trim hardware
- Adjustable wrench or strap wrench: the strap wrench protects the finish on any chrome or brushed-nickel components you plan to reuse
- Plumber’s tape: applied to male threads only, never female
- Silicone caulk and caulking gun: for sealing the escutcheon and spout base against the wall
Removing the Old Faucet and Handle Safely
Disassembling the Handle and Trim
Most bathtub handles hide their screws behind a decorative index button or cap: the small disc on the front of the handle that typically shows “H” or “C.” Pry that cap off carefully with a flathead screwdriver, and you’ll find the set screw underneath. Depending on the manufacturer, that screw takes either a Phillips head or a hex key. Loosen it and pull the handle straight off the valve stem; if it resists, a gentle rocking motion usually breaks the mineral bond without damaging the stem.
Once the handle is off, the escutcheon plate, which is the trim ring that covers the hole in the tile, is typically held by screws or by a friction fit against a bead of caulk. Before you pull it away from the wall, score around its perimeter with a utility knife to slice through the old caulk. Skipping this step and yanking the plate free can crack the surrounding tile, which turns a faucet replacement into an unnecessary tile repair job.
Extracting the Old Spout
Check the underside of the spout near the wall for a small set screw. If one is present, you have a slip-on spout that slides over a smooth copper pipe stub; loosen the screw with an Allen wrench and the spout should pull straight off. If there’s no set screw, the spout is threaded onto a pipe nipple; turn it counterclockwise to unscrew it. Use a strap wrench rather than pliers on any component you plan to reuse or on finished surfaces you don’t want scratched. Pliers on chrome will leave marks that no amount of polishing will fully erase. That ruins the finish.
Older homes in Jacksonville and Orange Park, particularly those with galvanized steel or early copper supply lines, can present a genuine hazard at this stage. Pipes that have been in service for decades may show surface discoloration, rust staining, or visible thinning around fittings. You shouldn’t have to deal with the stress of a broken pipe. If you notice any of those signs when the spout comes off and the pipe stub is exposed, stop before applying any torque to the connection. Brittle or heavily corroded pipe can crack under the force required to remove a stuck fitting, and a cracked supply line behind the wall is an emergency, not a repair you can finish on a Saturday afternoon.
[Inline Image]PLACEHOLDER Photograph showing a hand using an Allen wrench to loosen the set screw on the underside of a bathtub faucet spout, close-up view, clean bathroom tile background, natural lighting. Instructional, realistic photography style.[/Inline Image] Alt text: Loosening the set screw on a slip-on bathtub faucet spout.If you are dealing with a seized set screw, corroded copper, or a stubborn valve cartridge, you shouldn’t have to deal with the stress of a broken pipe. Day or night: we’ll be right over. Call (904) 209-9103 or reach a plumber in Jacksonville, FL today.
Installing Your New Bathtub Faucet Step by Step
Start with a clean pipe. Strip off all the old plumber’s putty, caulk residue, and tape from the pipe threads or stub-out before anything else goes on. Any debris left on the threads will compromise the new seal. Once the surface is clean and dry, apply plumber’s tape clockwise around the male threads only; two to three wraps is typically enough, though always defer to the new faucet’s installation instructions if they specify otherwise. Pipe-joint compound is an acceptable alternative to tape, but again, male threads only.
For a slip-on spout, slide it onto the pipe stub until it sits flush against the wall, then tighten the set screw firmly: snug, not cranked down. For a threaded spout, turn it clockwise until it seats against the wall; the final position should have the spout pointing straight down, and if it overshoots that position, back it off slightly and add another wrap of tape rather than forcing it past the correct alignment. Mount the new escutcheon plate over the valve body, ensuring the gasket or seal behind it is seated evenly. Then install the handle over the valve stem and tighten the set screw.
Once the trim is in place, run a bead of silicone caulk around the perimeter of the escutcheon where it meets the tile, and around the base of the spout. Leave a small gap, a weep hole, at the bottom of each caulk line. This is crucial. That gap allows any water that does get behind the trim to drain out rather than pooling against the wall substrate. A sealed perimeter with no weep hole traps moisture and accelerates mold growth and tile adhesive failure.
Before heading to your local Orange Park hardware store, run through this compatibility checklist to avoid a second trip:
- Measure the distance the pipe stub extends from the wall; slip-on spouts have specific depth requirements.
- Identify whether your existing spout is a slip-on or threaded connection before purchasing a replacement.
- Check the handle configuration, single-handle versus multi-handle, to confirm it matches your existing valve body.
- Verify that the new fixture packaging lists compliance with ASME A112.18.1 / CSA B125.1 and NSF 61 standards.
With the faucet installed, restore the water supply slowly; open the main shutoff gradually rather than all at once, which reduces the pressure surge on the new connections. Have someone positioned at the tub watching the spout and the escutcheon base while you open the valve. Any immediate drip at the spout base or from behind the trim tells you exactly where the seal needs attention before the caulk sets. Speaking of caulk: silicone bathroom sealants require a full cure before they can handle direct water exposure. The exact drying time varies by product, so check the packaging for the manufacturer’s recommendation before running water over the new installation.
Answers to Your Common Bathtub Faucet Questions
Here at Lance Maxwell Plumbing, we get a lot of questions from our neighbors about how these systems work in Jacksonville and Orange Park. Let’s clear up some of the most common doubts.
How do I fix a leaky bathtub faucet without replacing the whole thing?
Often, a leak traces back to a worn-out washer or a degraded O-ring inside the valve, not the faucet body itself. Cartridge replacement is the most common fix: pull the handle, extract the cartridge, and swap it for an exact-match replacement from the same manufacturer. Shut off the main water supply before disassembling anything, since residential tubs don’t have dedicated local shutoffs.
What is the difference between a slip-on spout and a threaded spout?
A slip-on spout slides over a smooth copper pipe stub and is held in place by a small set screw on its underside, typically tightened with an Allen wrench. A threaded spout screws directly onto a threaded pipe nipple that extends from the wall. The two types are not interchangeable; the pipe stub behind your wall determines which type you need, so check before purchasing.
Why is my new bathtub faucet leaking from the wall connection?
Nine times out of ten, this comes down to plumber’s tape applied incorrectly: either wrapped in the wrong direction, applied to female threads instead of male, or skipped entirely. Wrap tape clockwise around male threads only, use two to three consistent layers, and make sure the connection is snug without being overtightened. Overtightening can crack the fitting or strip the threads, which creates a worse leak than the one you started with.
Can I use any brand of cartridge to replace my faucet valve?
No. Valve cartridges are highly brand-specific and frequently model-specific within a brand. A Moen cartridge will not seat correctly in a Kohler valve body, and even within a single brand, cartridge design changes between product generations. Pull the old cartridge, photograph it, and bring it to the hardware store or look up the model number on the manufacturer’s website before ordering a replacement.
Do I need to apply plumber’s putty when installing a new spout?
It depends on the manufacturer’s instructions for your specific model. Some spouts call for plumber’s putty around the base where it meets the wall; others specify silicone caulk; some require neither if the trim includes a built-in gasket. Always check the installation sheet that comes with the fixture; using putty where silicone is specified (or vice versa) can cause the seal to fail prematurely or stain the surrounding tile.
Replacing a bathtub faucet is genuinely one of the more satisfying DIY plumbing projects: the scope is defined, the tools are manageable, and the result is immediately visible. Most homeowners with basic mechanical comfort can handle a simple cartridge swap or spout replacement in a couple of hours. Where it gets complicated is in the variables: older homes with galvanized or early copper lines, proprietary valve bodies that require brand-specific parts, or corroded fittings that won’t release without risking the pipe behind them. Those situations aren’t failures of skill: they’re just the point where the cost of a professional visit is lower than the cost of the damage a forced repair can cause.
We have been keeping Orange Park families comfortable since the ’90s. We know local plumbing. Our master plumbers have seen every combination of aging pipe, hard-water scale, and outdated valve body that Northeast Florida homes produce. Homeowners like Karen Hall have noted that our team is “very professional and fixed our problem.both him and his helper were polite and to the point! I would highly recommend Lance Maxwell Plumbing !” Rick Creel put it plainly: “Had Ethan Woodard come out to my property today service some basic plumbing repairs and he taught me how to fix the issues myself in the future as well as not overcharging me for additional stuff that I didn’t need . Great Service will use again” And John Spahni summed it up: “The guys came out today and did a fantastic job clearing out my clogged washer drain, highly recommend LM for your plumbing service needs!”
Ready to book a professional installation or get a second opinion on what you’ve found behind the wall? Lance Maxwell Plumbing in Jacksonville serves homeowners across Orange Park, Jacksonville, Middleburg, Clay County, and Duval County. Day or night: we’ll be right over. Call us at (904) 209-9103 to get started.