
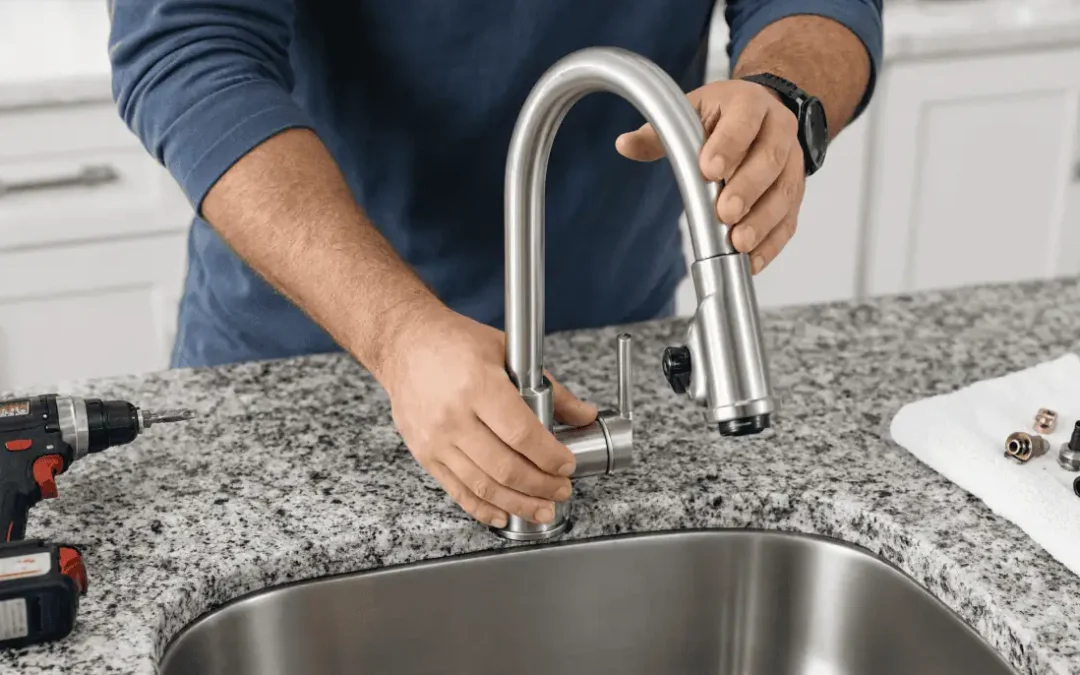
A dripping kitchen faucet is one of those household problems that starts as a minor irritant and quietly grows into something you notice every time you walk past the sink. Whether you’re in Orange Park, Jacksonville, or anywhere across Clay County and Duval County, the fix usually comes down to one decision: repair what’s failing or replace the whole fixture. You have options. Your neighbors at Lance Maxwell have been helping Northeast Florida homeowners work through exactly that call since 1994, earning the “Best of Clay” award four consecutive years, not by pushing unnecessary work, but by giving people an honest read on what their plumbing really needs.
Replacing a kitchen faucet is a manageable DIY project for most homeowners with basic mechanical comfort. That said, “manageable” doesn’t mean without risk if you skip the fundamentals. Florida’s plumbing code governs the materials, connection types, and water supply requirements that apply to every residential kitchen fixture, and understanding those standards before you start is what separates a clean, lasting installation from a callback job three months later.
Deciding to Repair vs. Replace a Leaking Faucet
When a kitchen faucet starts dripping, the first question is whether a targeted repair will hold or whether you’re better off replacing the unit entirely. A worn washer or a loose packing nut can often be swapped out in under an hour with minimal disassembly. But when a faucet has been in daily service for many years, the more likely culprit is internal seal wear: the gradual breakdown of O-rings, cartridges, and valve seats that no amount of tightening will correct. Corrosion around the base, persistent mineral buildup inside the spout, or a handle that wobbles despite repeated tightening are all indicators that the fixture itself has reached the end of its serviceable life. At that point, replacement is the more durable investment, and the cost difference between a repair attempt and a new faucet is rarely significant enough to justify prolonging a failing unit. It saves money later.
There’s also a regulatory dimension worth understanding before you purchase a replacement. Under the Florida Building Code Plumbing Standards, kitchen faucets are classified as fixtures that must be supplied exclusively with a potable water supply: water that meets drinking-water safety standards. Florida’s Department of Environmental Protection, under Chapter 62-610, strictly bans the use of reclaimed water in any fixture intended for culinary or drinking purposes. If you’re replacing a faucet and making any modifications to the supply lines in the process, those connections must feed from the potable water system without exception. Cross-connecting a reclaimed line, even inadvertently, constitutes a code violation and introduces a genuine contamination risk into your household water supply.
Essential Tools and Materials Needed
Gathering your tools before you crawl under the sink sounds obvious, but it’s the step most DIYers skip, and it’s why so many faucet replacements stretch into two-day projects. Having the right equipment on hand prevents the classic mid-project hardware store run, which almost always happens when the water is already off and the old faucet is halfway out. Plan ahead.
If you’re weighing the cost of gathering tools against the cost of hiring out, industry data from the Angi Faucet Installation Cost Guide puts the national average range for professional kitchen faucet installation at $162 to $364. That figure covers professional-grade tools, the expertise to handle unexpected complications like seized valves or non-standard mounting configurations, and the guarantee that the finished installation meets code. For a homeowner who already owns most of the tools listed below, DIY makes clear financial sense. For someone buying tools specifically for this single job, the math is worth running before you commit.
For a standard kitchen faucet replacement, you’ll need:
- A basin wrench: the single most critical tool for reaching the mounting nuts in the cramped, shadowed space behind the sink basin where a standard wrench can’t generate useful torque.
- An adjustable wrench and slip-joint pliers for disconnecting supply lines and snugging fittings.
- NSF 61-compliant shutoff valves, if your existing valves are corroded or difficult to operate (the Florida Building Code requires all valves supplying drinking water to meet NSF 61 standards, covering ball, gate, globe, and plug configurations).
- ASME A112.18.6-compliant flexible water connectors, required for any connector exposed to continuous water pressure, and which must remain physically accessible after installation per Florida code.
- Thread seal tape (Teflon tape) and silicone sealant for sealing threaded fittings and the faucet base perimeter.
If you’d rather skip the tool inventory and get a code-compliant installation handled by a friendly master plumber who knows Northeast Florida plumbing inside and out, your neighbors at Lance Maxwell offer plumbing services in Fleming Island and throughout the surrounding area. We are available day or night and have earned the “Best of Clay” award four consecutive years, which means you’re not calling a stranger, you’re calling a neighbor who’s already worked in homes like yours.
How to Safely Disconnect and Remove the Old Faucet
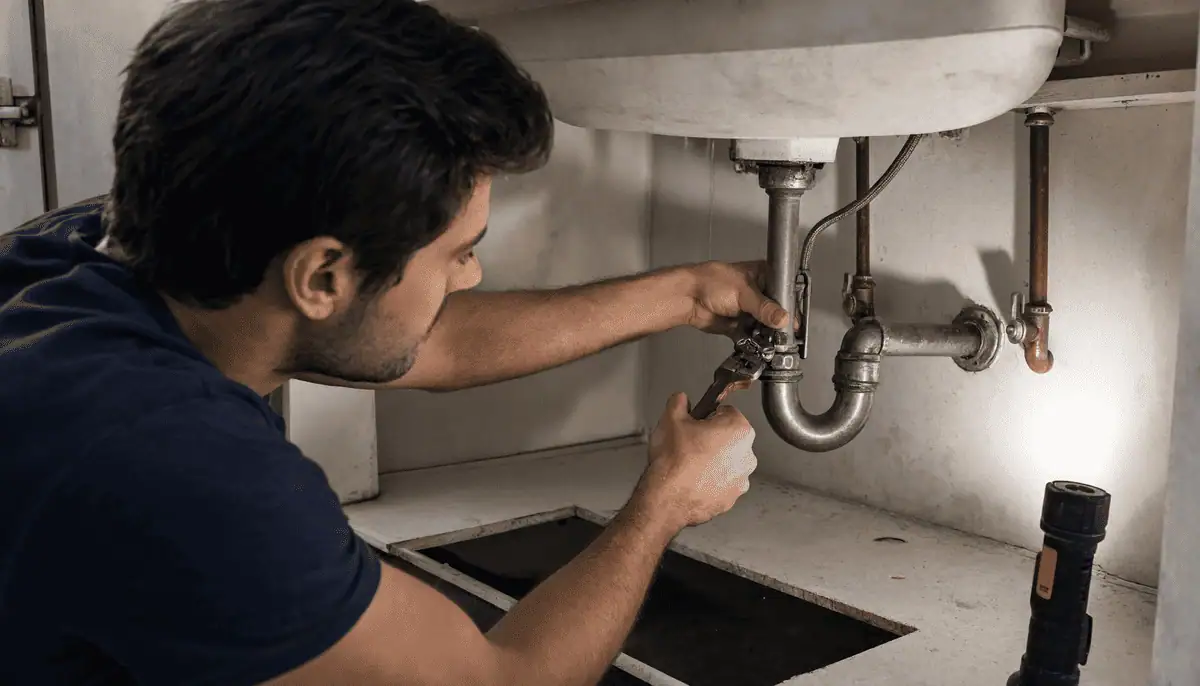
The first action before touching any fitting is to locate and close the individual shutoff valve for each supply line, one for hot and one for cold, underneath the sink. The Florida Building Code requires a shutoff valve on the fixture supply to each individual plumbing fixture in residential occupancies precisely so you can isolate the sink without cutting water to the entire house. Once both valves are closed, open the faucet handles fully to bleed off residual pressure and let the remaining water drain from the lines. Skipping this step reliably results in water in your face and on your cabinet floor the moment you loosen the first fitting.
When you disconnect the flexible supply lines from the shutoff valves, pay attention to what metals you’re working with. If your existing plumbing joins dissimilar metals, copper supply tubing meeting galvanized steel fittings, for example, those connections must use a brass fitting or a dielectric union conforming to ASSE 1079, per Florida Building Code requirements. Using the wrong connector at a dissimilar-metal junction speeds up galvanic corrosion and can produce a slow, persistent leak that goes undetected for months behind the cabinet door. Once the supply lines are disconnected, the only thing holding the faucet body in place is the mounting nut underneath the sink deck.
That’s where the basin wrench becomes your best friend. It is a lifesaver. Most kitchen sink mounting nuts sit 8 to 12 inches back from the cabinet opening, behind the drain assembly, in a space where a conventional wrench can’t establish a workable angle. A basin wrench’s long handle and pivoting jaw let you reach up behind the sink basin and apply deliberate torque to the nut without contorting your upper body into an unsustainable position. If the nut is corroded, and on a faucet that has been in daily service for years it almost certainly will be, patience and penetrating oil will accomplish more than brute force.
Follow these steps in sequence to remove the old faucet without damaging the sink deck or the supply valves:
- Turn off the shutoff valves: Rotate them clockwise until they stop moving.
- Relieve line pressure: Open both faucet handles to drain the remaining water.
- Prepare for spills: Place a bucket and dry towels under the connections before loosening anything.
- Disconnect the supply lines: Use an adjustable wrench, working slowly to avoid stressing the valve bodies.
- Unscrew the mounting nut: Use the basin wrench to detach the faucet body from the sink deck, then lift the old faucet out from above.
Step-by-Step Installation of the New Kitchen Faucet
Thorough kitchen faucet installation begins before the new faucet ever contacts the sink surface. Once the old unit is out, clean the sink deck completely: mineral scale, residual putty, and old silicone all need to be removed before you seat the new faucet base. If your replacement uses a deck plate to cover multiple mounting holes, dry-fit it first to confirm alignment and check that the plate sits flush. Most manufacturers include a rubber or plastic gasket under the base; if yours doesn’t, a thin, continuous bead of silicone sealant around the perimeter will prevent water from seeping under the deck plate and into the cabinet below, where it can cause wood rot and mold growth that won’t surface until it’s already a significant repair.
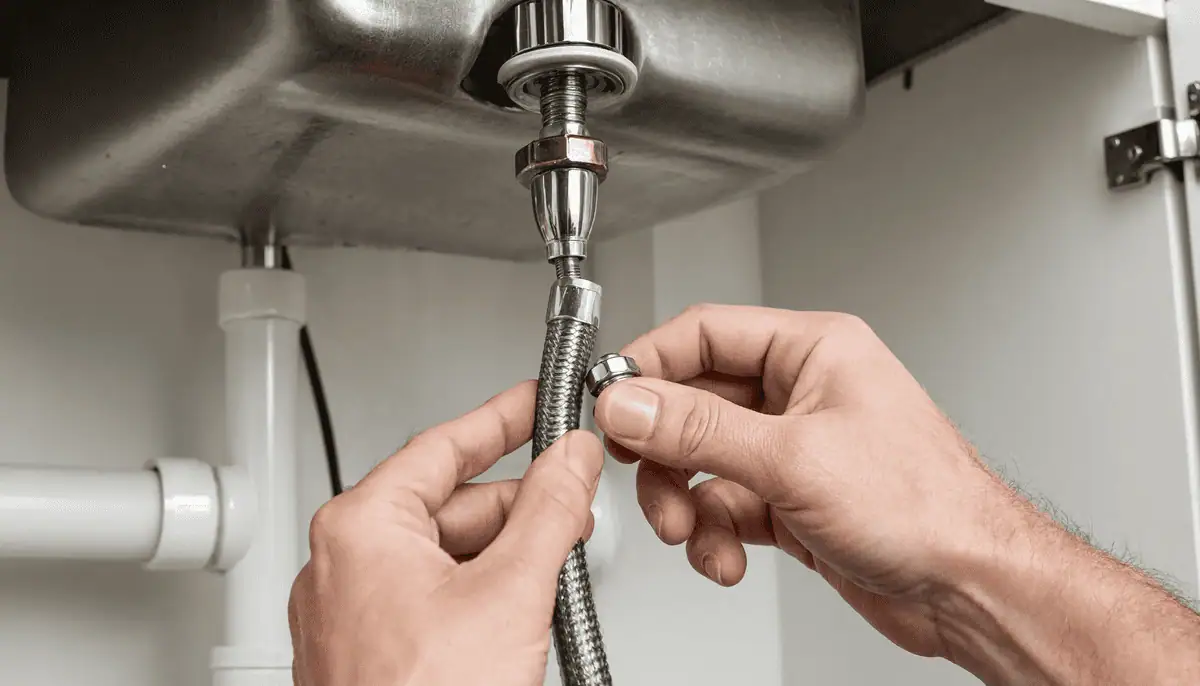
The supply line connections are where code compliance carries the most practical weight. Any flexible water connectors exposed to continuous pressure must conform to ASME A112.18.6, and the Florida Building Code requires that physical access be maintained to all such connectors after installation, meaning you cannot enclose them behind a fixed panel or wall. Most modern faucets ship with braided stainless supply lines that already satisfy this standard, but it’s worth verifying the spec sheet before purchase rather than discovering a compliance gap mid-installation. Thread the supply lines through the faucet mounting hole, lower the faucet body into position, and hand-tighten the mounting nut from below before snugging it with the basin wrench. Avoid over-tightening; the sink deck is not a structural anchor point, and a cracked deck is a far more expensive problem than a nut that needs one more quarter turn.
With the faucet body secured, connect the hot and cold supply lines to their respective shutoff valves. Hot connects to the left valve, cold to the right: a standard so consistent across residential plumbing that reversing it will confuse every person who uses the sink going forward. Keep them straight. Apply thread seal tape to the threaded fittings before connecting, and tighten with an adjustable wrench to finger-tight plus a quarter turn. Compression-style shutoff valves don’t require tape on the valve end, but the compression nut must seat squarely before you apply torque, or you’ll get a slow drip at the valve body that’s easy to miss during the initial test.
If you’ve reached this point and discovered the project is more involved than anticipated: whether you run into seized shutoff valves, supply lines that don’t reach the new faucet’s inlets, or a mounting configuration that doesn’t match your sink deck, that’s a completely normal place to stop and reassess. Your neighbors at Lance Maxwell are available day or night, so you’re never stuck with a disassembled sink and no running water overnight. If you’re uncertain whether your situation warrants professional intervention, our guide on when to call an emergency plumber can help you make that determination before a manageable complication becomes an urgent one.
Testing for Leaks and Post-Installation Checks
Once everything is connected, resist the impulse to open the shutoff valves all the way immediately. A slow, gradual reopening gives you the opportunity to catch problems at the joint before they become standing water on the cabinet floor.
- Open the valves slowly: Turn the shutoff valves open slowly, a quarter turn at a time, and watch the supply line connections closely for any immediate drips or weeping at the fittings.
- Flush the lines: Run both hot and cold water for at least two minutes to flush air pockets and any debris that settled in the lines during the swap.
- Inspect with a paper towel: Dry the interior of the cabinet completely, then run the faucet again and inspect every connection with a dry paper towel; even a slow seep will register as a damp spot on dry paper.
- Check the aerator: Confirm that the faucet aerator is clear and that water flow is steady and unobstructed: a restricted aerator typically means installation debris entered the screen and needs to be rinsed out.
You can also revisit our full guide to replace a kitchen faucet for a detailed walkthrough of each stage from removal through final testing.
The paper towel method catches most surface drips, but slow seeps at threaded connections can take several hours to develop into visible moisture. A more reliable long-term check is to perform a basic leak test using dry tissue paper or moisture-detection strips placed at each joint, then re-examined after 24 hours. Under Florida regulations, after any significant plumbing repair, individual water supply systems must be thoroughly purged and cleaned: in practical terms, this means running the faucet long enough to fully flush the lines before using the water for cooking or drinking. The requirement exists for good reason: installation work can introduce debris, flux residue, or biofilm into the supply lines, and a thorough flush removes those contaminants before they reach a glass or a pot.
Many homeowners also discover that a faucet replacement surfaces a secondary issue that had been quietly developing: a slow-draining sink, a shutoff valve that won’t fully close, or supply lines that are undersized for the new fixture’s flow rate. If the initial test reveals anything unexpected, address it before closing up the cabinet. Do not wait. Catching a secondary problem at this stage costs a fraction of what it costs to diagnose and repair it after the cabinet is back in service.
Frequently Asked Questions About Faucet Replacement
Can I replace my kitchen sink faucet without removing the sink?
Yes. Most modern faucets are engineered to be installed and secured entirely from above or from the underside using an adjustable wrench or a basin wrench. Removing the sink is rarely necessary and adds considerable complexity to what is otherwise a contained swap. The only scenario where sink removal becomes relevant is when the mounting holes need to be moved or enlarged, a situation that almost never arises with a like-for-like faucet replacement.
Which kitchen faucet is the easiest to install?
Single-hole mount faucets are generally the most simple option for DIY installation. They require fewer connections than three- or four-hole configurations, and many models feature quick-connect supply hoses that snap directly onto the shutoff valves without specialized tools or thread tape. If you’re replacing a multi-hole faucet with a single-hole model, a deck plate covers the unused openings and gives the installation a finished appearance without requiring any modification to the sink.
How much should a plumber charge to replace a kitchen faucet?
Costs vary by region and job complexity, but industry data puts the national average range for professional labor at $162 to $364 (per the Angi Faucet Installation Cost Guide). That range covers a standard replacement with no unexpected complications. Seized shutoff valves, corroded supply lines, or non-standard mounting configurations can push the final cost higher, but those are also the scenarios where professional experience pays for itself most clearly: a master-level plumber can diagnose and resolve those complications in the same visit rather than leaving you with a partially functional sink.
Do I need to replace my shutoff valves when replacing a faucet?
Not automatically, but it’s worth a close inspection before you commit to leaving the old ones in place. If your existing valves are stiff to operate, show visible corrosion at the body or stem, or weep when closed, replacing them at the same time is the practical choice. New NSF 61-compliant shutoff valves, required under the Florida Building Code for all valves supplying drinking water, ensure you can safely isolate the fixture for any future maintenance without triggering a plumbing emergency. Replacing them while the supply lines are already disconnected adds minimal time and effort to the overall project.
What joints are prohibited when connecting my faucet supply lines?
Under the Florida Building Code, several joint types are expressly prohibited: cement or concrete joints, solvent-cement joints between different types of plastic pipe, joints made with unapproved fittings, and saddle-type fittings. When working with dissimilar metals, copper to galvanized steel, for instance, the connection must use a brass fitting or a dielectric union conforming to ASSE 1079. Using any of the prohibited joint types in a residential water supply system is a code violation regardless of whether the installation is permitted or unpermitted, and it creates a failure point that can be difficult to locate after the fact.
A kitchen faucet replacement is one of those projects where preparation does most of the heavy lifting. Get the right tools, understand what Florida’s code requires for your supply connections, and take the time to test thoroughly before declaring the job complete. Take your time. Most homeowners in Orange Park, Jacksonville, Middleburg, and across Clay County can work through this project in an afternoon, and when the job turns out to be more involved than expected, or when a Saturday under the sink simply isn’t how you want to spend your weekend, your neighbors at Lance Maxwell are just a call away. We’ve been keeping our neighbors safe since the ’90s, we understand the plumbing conditions specific to Florida’s water chemistry and older housing stock, and we bring the same standard of care to a faucet swap as to any larger repair.
Call Lance Maxwell Plumbing for Kitchen Faucet Installation
Replacing a kitchen faucet can improve the look, function, and convenience of your kitchen, but the job needs to be done correctly to prevent leaks and long-term plumbing problems. Whether you are upgrading to a stylish new fixture, replacing a worn-out faucet, or dealing with unexpected plumbing issues under the sink, we are here to help. We are your trusted Jacksonville plumber, proudly serving the Jacksonville and Orange Park areas with more than 31 years of plumbing installation and repair experience.
At Lance Maxwell Plumbing, we offer a full line of plumbing services, including new construction applications, water heater installation, preventive maintenance, faucet installation, and plumbing repairs. Our friendly and knowledgeable staff will do whatever it takes to ensure the needs of every customer are met. With our on-call 24/7 availability, you can rest assured that our team will be there to resolve your plumbing issues, day or night. We also offer high-quality plumbing products from trusted brands like Delta, Kohler, and Moen. Contact us today, and one of our representatives will be glad to assist you in addressing your plumbing needs.