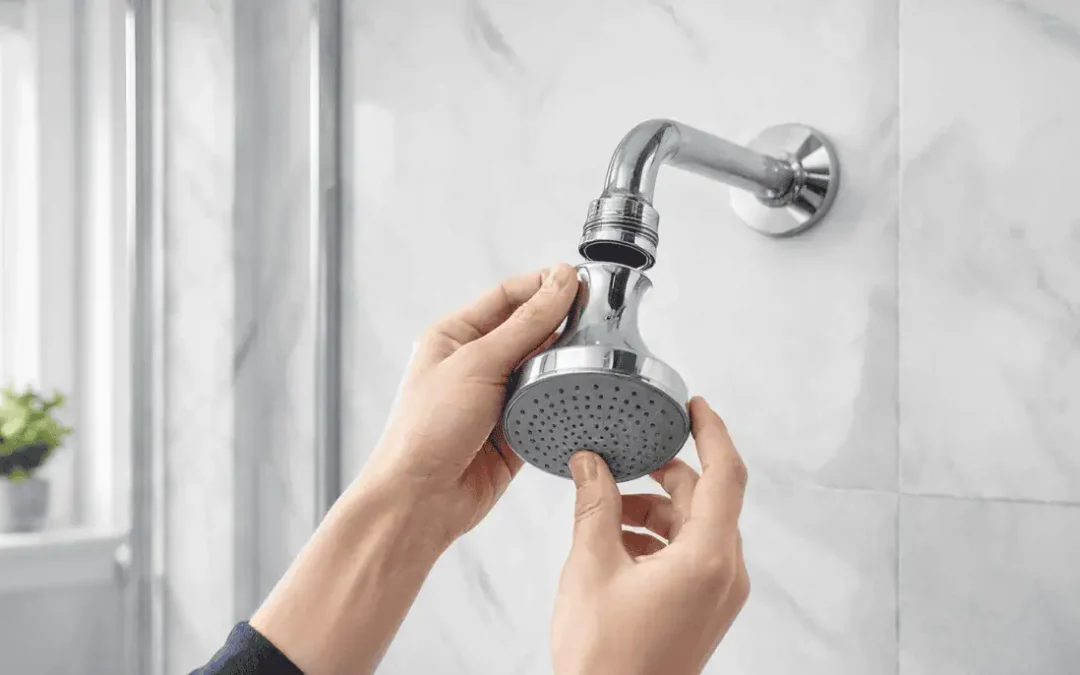
Learning how to replace a shower head is one of those simple home improvement tasks that can make a surprisingly big difference in your daily routine. A worn-out shower head can cause weak water pressure, uneven spray patterns, leaks, or mineral buildup that makes your shower feel less refreshing than it should. The good news is that replacing a shower head is usually a straightforward project that many homeowners can handle with a few basic tools and a little patience. At the same time, plumbing can sometimes be full of surprises, and not always the fun kind. That is why we always recommend taking your time, using the right materials, and knowing when it is best to call in a professional.
Why Replace Your Shower Head?
There are plenty of reasons to replace a shower head, and not all of them involve a major plumbing issue. Sometimes, the old shower head simply looks outdated or no longer matches the style of the bathroom. Other times, mineral buildup from hard water can clog the spray nozzles, causing inconsistent water flow or a weak spray. A new shower head can improve comfort, boost efficiency, and give your bathroom a quick refresh without requiring a full renovation. In some cases, upgrading to a water-saving model can even help reduce water usage while still giving you a satisfying shower.
A replacement may also be a smart choice if your current shower head is leaking around the connection point. Even a small drip can waste water over time and leave behind stains or mineral deposits. If the shower head is cracked, rusted, or difficult to adjust, it may be time for an upgrade. Newer models also offer more spray settings, handheld options, and better overall performance. In short, if your shower has started to feel more like a sad drizzle than a relaxing rinse, a new shower head can help.
Tools and Materials You May Need
Before getting started, it helps to gather everything you need in one place. This keeps the job moving smoothly and helps prevent the classic mid-project search for something you were sure was in the garage. Most shower head replacements do not require specialized tools, but having a few basics nearby can make the process easier. You should also read the instructions that come with your new shower head, since different models may have slightly different installation steps. A handheld shower head, rain shower head, or filtered shower head may include additional washers, brackets, or hoses.
You may need:
- New shower head
- Adjustable wrench or pliers
- Plumber’s tape, also called Teflon tape
- Soft cloth or towel
- Old toothbrush or small cleaning brush
- White vinegar, if mineral buildup is present
- Bucket or small container, if needed
The soft cloth is especially useful because it helps protect the finish on your shower arm and new shower head. If you use pliers or a wrench directly on the metal, you may scratch the surface. Wrapping the cloth around the fixture first gives you a better grip while reducing the chance of damage. Plumber’s tape is also important because it helps create a watertight seal at the threaded connection. It is inexpensive, easy to use, and one of those small items that can prevent a big annoyance later.
Step 1: Turn Off the Shower
For most basic shower head replacements, you do not need to shut off the water supply to the entire home. You should, however, make sure the shower faucet is fully turned off before you begin. This may sound obvious, but plumbing work has a way of reminding people when they skip the obvious steps. If the faucet is leaking or difficult to shut off completely, that may indicate a separate issue with the valve. In that case, it may be best to have a professional plumber take a look before moving forward.
Once the shower is off, place a towel on the floor of the tub or shower area. This can help catch any small parts that fall during the project and protect the surface from tools. It also helps absorb any leftover water that drains from the old shower head after removal. If you are working in a tiled shower, a towel can reduce the chance of a dropped wrench causing damage. Small preparation steps like this can save you a headache later.
Step 2: Remove the Old Shower Head
To remove the old shower head, start by turning it counterclockwise by hand. In many cases, it will loosen without much effort. If it is stuck, use an adjustable wrench or pliers, but place a soft cloth around the connection first to protect the finish. Hold the shower arm steady while loosening the shower head so you do not accidentally twist or damage the pipe coming out of the wall. The shower arm is connected to plumbing behind the wall, so it is important not to use excessive force.
If the shower head will not budge, mineral buildup or corrosion may be the reason. You can try soaking the connection area with white vinegar to help loosen deposits. Let it sit for a little while, then try again gently. Avoid forcing the fixture, especially if the shower arm looks old, rusty, or unstable. When a simple replacement starts feeling like a wrestling match, that is usually a good sign to call a plumber before something breaks behind the wall.
Step 3: Clean the Shower Arm Threads
After removing the old shower head, take a moment to inspect the threads on the shower arm. You may notice old plumber’s tape, mineral deposits, or grime around the connection. Use your fingers, a cloth, or a small brush to clean the threads thoroughly. If there is old tape, remove it completely before applying new tape. A clean connection helps the new shower head attach properly and reduces the chance of leaks.
If mineral buildup is heavy, white vinegar can help dissolve it. Apply vinegar with a cloth or soak the end of the shower arm if possible. Then scrub gently with an old toothbrush or small cleaning brush. Be careful not to damage the threads, since they are needed to create a secure seal. Once the threads are clean and dry, you are ready for the next step.
Step 4: Apply Plumber’s Tape
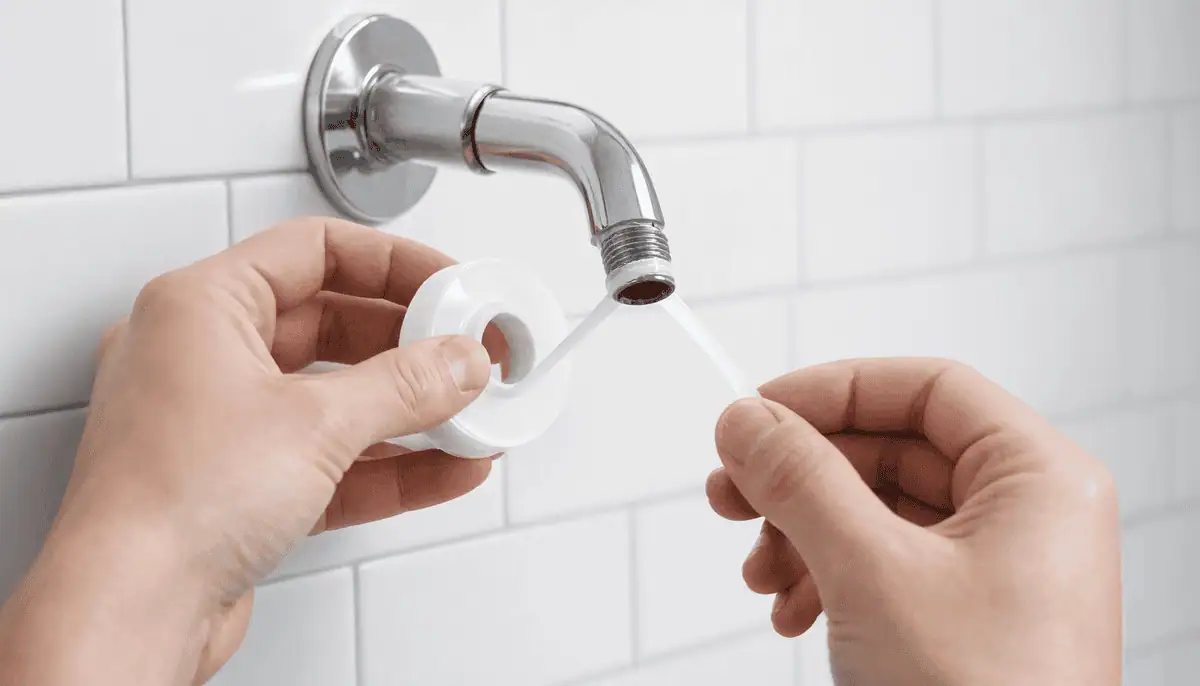
Plumber’s tape helps seal the threaded connection between the shower arm and the new shower head. To apply it correctly, wrap the tape clockwise around the threads of the shower arm. This direction matters because the shower head will also tighten clockwise, which helps the tape stay in place instead of unraveling. In most cases, two or three wraps are enough. You want a smooth layer, not a bulky wad of tape.
Press the tape gently into the threads so it sits securely. Avoid covering the opening of the shower arm, since water needs a clear path through the pipe. If the tape bunches up or looks uneven, remove it and start again. It only takes a few seconds to redo, and a clean application can help prevent leaks. Think of plumber’s tape as the tiny detail that quietly does a very important job.
Step 5: Install the New Shower Head
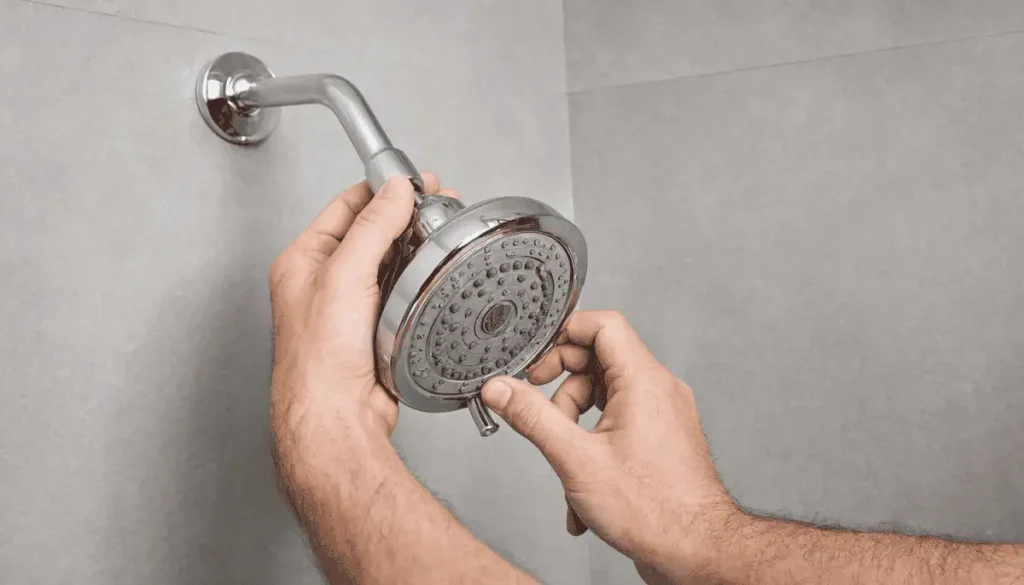
Now it is time to attach the new shower head. Carefully thread it onto the shower arm by turning it clockwise. Start by hand to make sure it lines up properly and does not cross-thread. Cross-threading can damage the connection and cause leaks, so do not force it if it feels crooked or difficult to turn. Back it off and try again until it turns smoothly.
Once the shower head is hand-tight, you may use a wrench or pliers to tighten it slightly more, depending on the manufacturer’s instructions. Again, use a soft cloth to protect the finish. Be careful not to overtighten, because too much pressure can crack parts or damage the threads. Many modern shower heads are designed to seal well without extreme force. Snug is usually the goal, not superhero strength.
Step 6: Test for Leaks
After the new shower head is installed, turn on the shower and check the connection point carefully. Look for dripping or spraying water around the threads. If you see a small leak, turn the water off and gently tighten the shower head a little more. If it still leaks, remove the shower head, check the tape, and reapply it if needed. Sometimes the tape may have shifted during installation.
Also, check the spray pattern and water pressure. A new shower head should provide a steady, even flow. If the pressure still seems weak, the issue may not be the shower head itself. There could be mineral buildup in the shower arm, a clogged cartridge, a pressure issue, or another plumbing concern. When replacing the shower head does not solve the problem, it may be time to have the system inspected.
Tips for Choosing the Right Shower Head
Choosing a new shower head can be more exciting than people expect. There are many options available, from simple fixed shower heads to handheld models and rainfall designs. Some homeowners prefer high-pressure models, while others want water-saving features. A handheld shower head can be especially helpful for bathing children, rinsing pets, cleaning the shower, or improving accessibility. Filtered shower heads may also appeal to homeowners concerned about hard water or chlorine.
When selecting a shower head, consider:
- Spray settings and pressure preferences
- Water efficiency ratings
- Finish and style
- Ease of cleaning
- Handheld versus fixed design
- Brand quality and warranty
- Compatibility with your existing shower arm
At Lance Maxwell Plumbing, we offer high-quality plumbing products from trusted brands like Delta, Kohler, and Moen. These brands are known for performance, durability, and design options that work well in many homes. A good shower head should not only look nice but also perform reliably over time. If you are not sure which model is best for your bathroom, we can help you choose one that fits your needs and budget.
Common Mistakes to Avoid
Although replacing a shower head is usually simple, a few common mistakes can cause problems. One of the biggest is overtightening the new shower head. This can damage the threads, crack plastic components, or make future removal difficult. Another mistake is forgetting to remove old plumber’s tape before applying new tape. Layering new tape over old material can create an uneven seal and lead to leaks.
Another issue is using tools without protecting the fixture finish. Metal tools can scratch chrome, brushed nickel, matte black, or other finishes if used directly on the surface. Some homeowners also forget to check whether the washer is properly seated inside the new shower head. If the washer is missing or crooked, the connection may leak even if plumber’s tape is applied correctly. Taking a few extra minutes during installation can help the finished result look better and work properly.
When To Call a Professional Plumber
A basic shower head replacement is often manageable, but there are times when calling a professional plumber is the right move. If the shower arm is loose, rusted, cracked, or difficult to remove, there may be a risk of damaging plumbing behind the wall. If water continues leaking after the new shower head is installed, the problem may be deeper than the fixture itself. A professional can inspect the connection, shower valve, water pressure, and related components to find the real cause.
You should also call a plumber if you are upgrading to a more complex shower system. Multi-function systems, body sprays, new valves, and major fixture changes may require professional installation. Plumbing that is not installed correctly can lead to leaks, water damage, or poor performance. We always believe in doing the job right the first time. After all, water is great in the shower, but not so great inside the wall.
FAQ
Can we replace a shower head without turning off the main water supply?
Yes, in most cases, the main water supply does not need to be turned off. As long as the shower faucet is fully off, you can usually replace the shower head safely. If the faucet will not shut off completely, call a plumber before starting.
Do we need plumber’s tape for a new shower head?
Plumber’s tape is usually recommended because it helps create a watertight seal at the threaded connection. Some shower heads include rubber washers that do most of the sealing, but tape can still help prevent small leaks. Always check the manufacturer’s instructions.
Why is the new shower head leaking?
A new shower head may leak because the connection is not tight enough, the plumber’s tape was applied incorrectly, or the washer is missing or not seated properly. Remove the shower head, inspect the parts, reapply tape if needed, and reinstall it carefully. If it still leaks, there may be another plumbing issue.
How often should we replace a shower head?
There is no strict timeline, but many homeowners replace a shower head when it becomes clogged, leaks, rusts, or no longer performs well. If cleaning does not restore proper water flow, replacement is often the best option. Upgrading can also improve comfort and water efficiency.
Can a new shower head improve water pressure?
A new shower head may improve the feel of water pressure if the old one was clogged or inefficient. However, it will not fix deeper plumbing pressure problems. If pressure remains low throughout the home, a plumber should inspect the system.
What type of shower head is best?
The best shower head depends on your preferences, bathroom setup, and budget. Handheld models are versatile, rainfall shower heads feel luxurious, and water-saving models can reduce usage. We recommend choosing a quality product from a trusted brand.
Call Lance Maxwell Plumbing for Trusted Plumbing Service
Replacing a shower head can be a simple upgrade, but plumbing problems are not always as straightforward as they look. If you need help with shower fixtures, leaks, water pressure issues, plumbing installation, water heater installation, preventive maintenance, or emergency plumbing repairs, we are here to help. We have more than 31 years of experience providing Jacksonville and Orange Park with dependable plumbing installation and repair services. Our friendly and knowledgeable staff will do whatever it takes to ensure every customer’s needs are met.
As your trusted Jacksonville plumber, we offer a full line of plumbing services for homes, businesses, and new construction applications. We are available on call 24/7, so you can rest assured that our team will be there to resolve your plumbing issues, day or night. To accompany our premium services, we also offer high-quality plumbing products from brands like Delta, Kohler, and Moen. Contact us today, and one of our representatives will be glad to assist you in addressing your plumbing needs.