
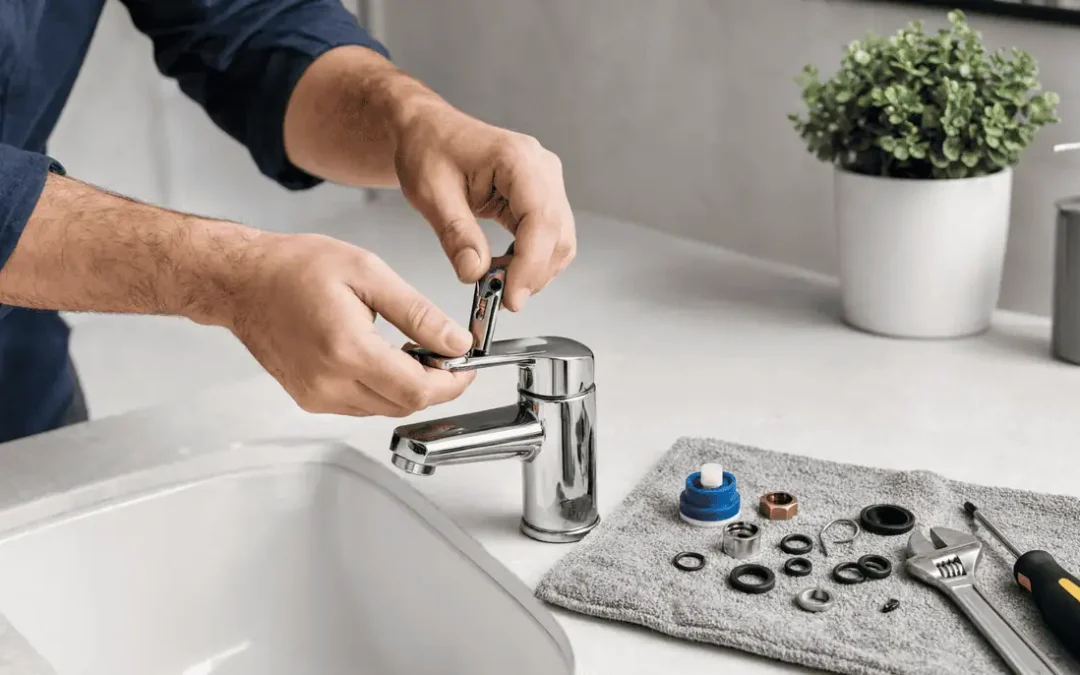
That dripping sound coming from your bathroom faucet at 2 a.m. is not a mystery. It is a worn-out cartridge telling you it is done. Time to replace it. The cartridge is the core of your faucet, the part that controls water flow and temperature every time you turn the handle. When its rubber seals crack or its housing wears through, water finds a path it shouldn’t have, and the dripping starts. The good news is that exchanging a cartridge is one of the more approachable plumbing repairs a homeowner can tackle on a weekend afternoon. It does not require tearing into walls or calling in reinforcements, at least not right away.
We’ll walk you through every step, from confirming the cartridge is the problem, to pulling the old one out, to getting the new one seated correctly and testing the repair. If you have done basic plumbing work before, most of this will feel familiar. If this is your first time inside a faucet body, take it slow and follow the sequence. The steps build on each other, and skipping ahead is where most DIY faucet repairs go sideways. For a broader overview of faucet cartridge replacement before you start, that resource covers the fundamentals well.
Diagnosing a Failing Faucet Cartridge
A dripping spout is the most obvious sign, but it is not the only one. A cartridge that is starting to fail often shows up first as a handle that feels stiff or squeaky when you turn it, or one that requires noticeably more force than it used to. Water seeping around the base of the handle, not from the spout itself, points to a compromised O-ring on the cartridge body. Difficulty getting a clean hot-cold mix, where the water temperature seems to jump unpredictably, is another reliable indicator that the internal seals have degraded. Any one of these indicators warrants a closer look. Two or more together, and the cartridge is almost certainly the culprit. Act quickly.
The distinction between a cartridge that is simply dirty versus one that has structurally failed matters before you spend money on parts. A cartridge clogged with sediment can sometimes be cleaned and reinstalled, restoring normal function without replacement. A cartridge with cracked housing or shredded O-rings cannot be saved; it needs to come out. The way to tell the difference is to remove it and inspect it directly. If the rubber seals are visibly torn, flattened, or missing chunks, you are replacing it. If the housing looks intact and the seals are pliable, a thorough rinse and reinstall is worth attempting first.
Water flow rate is worth checking while you have the faucet apart. Older faucets typically flow at around 2.2 gallons per minute. According to the EPA WaterSense program, fixtures rated at a maximum of 1.5 gallons per minute can reduce a sink’s water consumption by 30 percent or more compared to standard models. If your faucet is aging and you are already doing the repair, it is a reasonable moment to evaluate whether a full fixture upgrade makes more sense than dropping in another cartridge.
When to Replace the Whole Faucet Instead
If the faucet body itself is corroded, pitted, or shows visible cracks in the brass valve seat, a new cartridge will not seal cleanly against damaged metal. The cartridge depends on a smooth, intact valve body to seat properly. No amount of silicone grease compensates for a pitted seating surface. It just won’t work. Faucets over 10 to 15 years old with visible corrosion around the valve body are often better candidates for full replacement than cartridge repair.
Cost is a reasonable factor here. According to Angi’s shower cartridge cost guide, a replacement cartridge typically runs between $10 and $65 depending on the brand and model. A full professional bathroom faucet replacement, by contrast, runs between $170 and $360 according to Angi’s faucet replacement cost guide. Trying the cartridge swap first is a pragmatic first move. If the faucet body is sound, you are done for a fraction of the cost. If the new cartridge still leaks because the valve seat is compromised, you have spent $10 to $65 to confirm that a full replacement is the right call, and that is still useful information.
One more factor is particularly relevant in Northeast Florida: Jacksonville and Clay County water supply carries high mineral content. Calcium and magnesium deposits accumulate inside faucet bodies over time, accelerating wear on rubber O-rings and seals. In hard-water areas, cartridges that might last a decade elsewhere can fail in five years or fewer. That same mineral buildup can also calcify around the cartridge body, effectively bonding it to the valve housing and making extraction significantly harder than it would be on a faucet in a low-mineral-content area.
Essential Tools and Preparation for Cartridge Replacement
Getting the right tools together before you start saves you from the mid-repair hardware store run, which, if you have ever done one while the water is shut off and the sink is disassembled, you know is an experience worth sidestepping. Most of what you need is standard household toolkit material, with one or two specialty items that make a meaningful difference.
- Screwdrivers: Both flathead and Phillips, for handle screws and decorative cap removal
- Hex keys and Allen wrenches: Essential for the set screw on single-handle faucets; the size varies by brand, so bring a full set
- Adjustable wrench or channel-lock pliers: For the cartridge retaining nut; wrap the jaws with electrical tape to protect chrome finishes
- Needle-nose pliers: For pulling the retaining clip on Moen-style cartridges
- Plumber’s silicone grease: Applied to the new cartridge’s O-rings before installation; petroleum-based grease degrades rubber, so use silicone specifically
- Cartridge puller tool: Strongly recommended for Moen cartridges and any fixture with hard water buildup; trying to yank a seized cartridge with pliers risks cracking the valve body
- Old towels, rags, and a small stiff brush: For catching water, protecting the sink basin, and scrubbing mineral deposits out of the valve housing once the old cartridge is out
Shutting off the water is non-negotiable before any of this begins. Do not skip this. Locate the individual shut-off valves under the sink (one for hot, one for cold) and turn them clockwise until they stop. If those valves are corroded or will not close fully, you will need to shut off the main water supply to the house instead. Once the supply is off, open the faucet handles and let them run until the flow stops completely. That bleeds residual pressure from the lines and prevents a surprise spray when you pull the cartridge.
With the water off, place a folded towel or rag over the sink drain before you remove anything. A set screw dropped into an open drain is a genuinely miserable way to spend an afternoon. Work in good light: a headlamp or a clip-on work light aimed into the faucet cavity makes a real difference when you are trying to see a retaining clip seated inside a chrome sleeve.
Remove the Faucet Handle
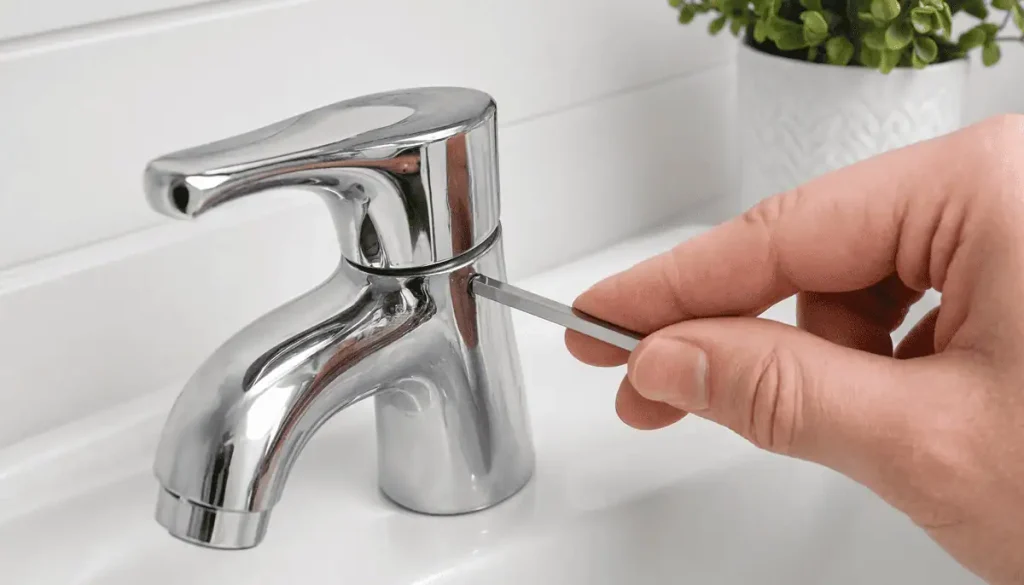
If the faucet handle is stiff or will not budge when you try to pull it off, do not force it. Mineral deposits in Jacksonville and the surrounding area have a way of bonding handles to stems with surprising tenacity. Soaking the base of the handle with white vinegar and letting it sit for 10 to 15 minutes will dissolve a significant portion of that calcification before you apply any real force. Penetrating oil works too, though vinegar is easier on chrome finishes and simple to clean up. For more context on dealing with stubborn fixtures and related issues, the faucet repair guide covers additional troubleshooting scenarios worth reviewing.
Running into a cartridge that will not budge, or not sure which parts to order? Your friendly neighbors at Lance Maxwell have been keeping Orange Park and Jacksonville flowing since the ’90s. We are ready to step in when a DIY repair hits a wall. Call (904) 209-9103 or explore our plumbing services in Jacksonville to schedule a visit.
Removing the Old Faucet Cartridge
Start at the handle. Most single-handle faucets have a decorative index cap, which is a small plastic disc usually marked “H” or “C” snapped into the top or front of the handle. Pry it off carefully with a flathead screwdriver. Underneath you will find the handle screw, typically a Phillips head or a hex set screw. Back it out completely and set it somewhere you will not lose it; a small magnetic tray or a piece of tape stuck to the countertop works well. With the screw removed, the handle should pull straight off the stem. If it balks, a light rocking motion side to side while pulling upward usually breaks the adhesion. Do not crank it sideways with force; the stem underneath is not designed to absorb lateral stress.
Once the handle is off, you will see a chrome bonnet or collar threaded onto the valve body. Unscrew it counterclockwise by hand or with a strap wrench if it is tight. Beneath the bonnet is where the cartridge retention mechanism lives. On Moen-style single-handle faucets, that is a U-shaped retaining clip seated in a groove at the top of the cartridge. On other designs, you will find a threaded brass retaining nut instead. The clip and the nut serve the same purpose (they lock the cartridge in place against water pressure) but they come out differently.
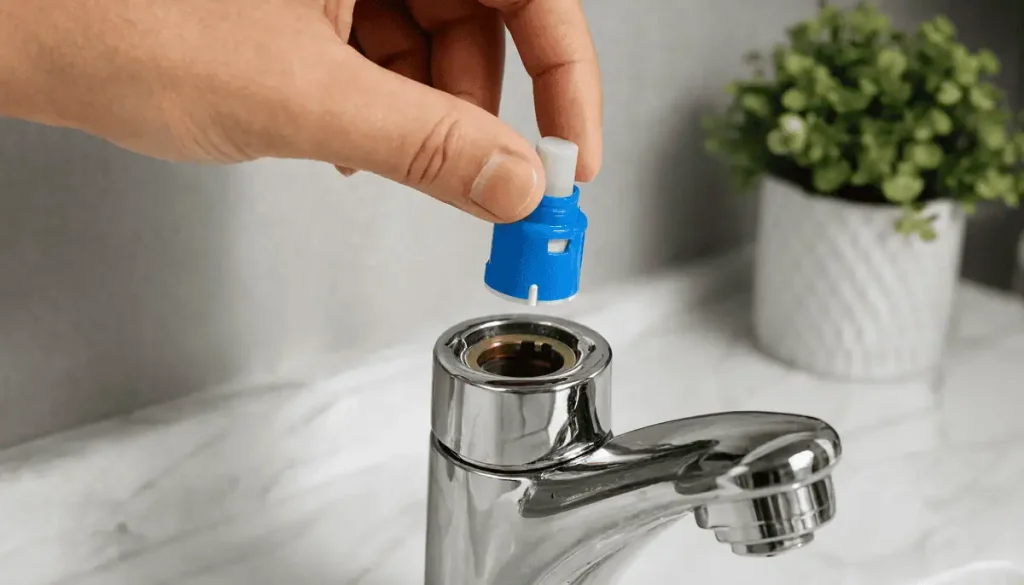
For the retaining clip, use needle-nose pliers to grip the top of the clip and pull it straight upward, not at an angle. It should slide out of its groove cleanly. Do not lose it. Set it aside carefully; the new cartridge uses the same clip, and losing it means a hardware store run before you can finish the job. For a retaining nut, grip the flat sides with an adjustable wrench and turn counterclockwise. If the nut is seized from mineral buildup, apply vinegar or penetrating oil and wait before applying more torque. Brass threads strip more easily than people expect, especially on older fixtures.
With the retention mechanism removed, grip the cartridge stem with pliers and pull straight upward. A slight twisting motion (not side to side, but a slow rotation while pulling) helps break the seal of the rubber O-rings against the valve body walls. On a faucet that has never been serviced, or one that has been sitting in hard water for years, that seal can be surprisingly stubborn. If the cartridge does not move after firm, steady upward pressure, reach for the cartridge puller tool rather than increasing force with pliers.
Once the cartridge is out, shine a light into the valve body and inspect the interior. Mineral scale on the walls of the valve housing will prevent the new cartridge from seating cleanly, so take a few minutes to scrub the interior with a small stiff brush dipped in white vinegar. Rinse it out with a damp cloth before installing the replacement.
When the Cartridge Won’t Come Out
Seized cartridges are more common in Northeast Florida than in most parts of the country, and the extraction process requires patience rather than brute force. Take your time.
- Apply white vinegar or penetrating oil directly into the valve body slot around the cartridge, and let it soak for at least 10 to 15 minutes before attempting extraction again.
- Use a dedicated cartridge puller tool: align it with the cartridge ears, thread the center screw down until it contacts the cartridge, then turn slowly and steadily to draw the cartridge upward without side-loading the valve body.
- Never apply side-to-side force with standard pliers; lateral stress on a stuck cartridge can crack or deform the brass valve body, which turns a cartridge swap into a pipe repair.
- Avoid using heat near the valve area: torches and heat guns near thin-walled copper supply lines or plastic cartridge components engender more complications than they resolve.
- If the cartridge breaks apart during extraction and the outer sleeve remains lodged in the valve body, stop and call a plumber. Extracting a broken cartridge sleeve without damaging the valve body is a job that requires specialized tools and experience.
Installing the New Faucet Cartridge and Reassembling the Fixture
Before the new cartridge goes anywhere near the valve body, match it physically to the old one. Even within a single brand (such as Moen, Kohler, Delta, or Toto) there are dozens of cartridge models, and the differences between them are not always apparent from the outside. Take the old cartridge to a hardware store and hold the two side by side. They must match. The stem length, the ear configuration, and the O-ring positions all need to match. A cartridge that is close but not exact will either leak immediately or prevent the handle from fitting correctly, and you will not know which until you have reassembled everything. Taking a few clear photos of the faucet body and the old cartridge from multiple angles before you leave the house gives store staff something to work with if the physical match is not conclusive.
Apply a thin, even coat of plumber’s silicone grease to every rubber O-ring and seal on the new cartridge. The grease serves two purposes: it lubricates the O-rings so they do not tear or roll out of their grooves during installation, and it helps the cartridge slide into the valve body without requiring excessive force. Do not skip this step and do not substitute petroleum jelly; petroleum-based products degrade rubber over time and will shorten the life of the new cartridge.
Orient the cartridge so its tabs or “ears” align with the matching slots in the valve body. Most cartridges are keyed so they can only go in one way, but double-check the orientation before pushing it home. On Moen cartridges, the stem should face forward (toward you) when the handle is in the off position. Push the cartridge firmly and evenly into the valve body until it bottoms out completely; you will feel it seat. Reinstall the retaining clip by pressing it back into its groove until it clicks, or thread the retaining nut back on by hand before snugging it with a wrench. Snug, not cranked down: overtightening a retaining nut on a plastic cartridge cracks it, and overtightening on brass threads strips them.
Reassembly runs in reverse order from disassembly. Slide the chrome bonnet or sleeve back over the cartridge and thread it clockwise until snug. Reinstall the handle adapter and any temperature limit stop (a small plastic disc that restricts how far the handle rotates toward the hot side) in the same orientation you removed them. Slide the handle back onto the stem, thread the set screw in by hand, then tighten it carefully with the appropriate hex key or screwdriver. Snap the decorative index cap back into place. The whole reassembly should take five minutes if the parts are organized in the order you removed them.
Orange Park and Middleburg homeowners: if you would rather have a professional handle the installation from start to finish, Lance Maxwell Plumbing is right down the road. We bring trusted local expertise, right down the street, with the tools and parts knowledge to get it done right the first time. Call (904) 209-9103 or visit our Orange Park plumbing services page to schedule.
Testing Your New Faucet and Preventing Future Wear
Turn the shut-off valves back on slowly (a quarter turn at a time) rather than cranking them open all at once. A sudden pressure surge through a freshly installed cartridge can dislodge the O-rings before they have had a chance to seat properly under normal operating pressure. Keep the faucet handle in the open position while you restore pressure so that trapped air bleeds out of the lines rather than building up behind the cartridge. You will hear some sputtering and see slightly turbid water for the first 20 to 30 seconds; that is normal and clears quickly.
Once the flow runs clear, close the handle and watch the spout for 60 seconds. No drip means the cartridge is seated and sealing correctly. That is the goal. Then check the base of the handle and the area around the bonnet for any seeping water. A slow weep around the bonnet usually means the retaining nut needs another quarter turn. Water at the handle base points to an O-ring that did not seat cleanly, which means the cartridge needs to come back out for inspection.
If the hot and cold sides are reversed (cold water comes out when you push the handle toward hot) the cartridge went in rotated 180 degrees. This is a common installation mistake and an easy fix: shut the water back off, pull the retaining clip, rotate the cartridge stem 180 degrees, reseat the clip, and retest. It takes about three minutes once you know what you are doing.
Post-Installation Testing and Maintenance Checklist
- Run the faucet for 2 to 3 minutes to flush out any trapped air, loose sediment, or residual silicone grease from the valve body.
- Wipe down the entire fixture with a dry towel and watch closely for any water seeping around the handle base or bonnet collar.
- Verify that the handle moves smoothly through its full range of motion without sticking, squeaking, or catching at any point.
- Clean the faucet aerator every six months: mineral buildup in the aerator creates backpressure that stresses cartridge seals over time.
- Inspect the shut-off valves under the sink twice a year; a shut-off valve that is seized open is a problem you want to discover during a routine check, not during an emergency.
- If hard water buildup continues to cause premature cartridge failure in your home, a whole-house water softener is worth serious consideration: it extends the life of every fixture, not just the faucet you just repaired.
The Longer Case for Fixing a Drip Promptly
A faucet that drips once per second wastes more water annually than most homeowners realize, and the utility bill impact compounds over months. Beyond the water cost, a cartridge that is seeping, even slowly, is pushing water somewhere it should not go. Water that migrates down behind the sink cabinet damages the cabinet floor, the subfloor beneath it, and over time creates the moisture conditions that support mold growth. A $10 to $65 cartridge swap, done promptly, is a simple way to avoid a repair bill that runs into the thousands. For a deeper look at what a persistent drip can cost you and how to track down the source, the leaky faucet troubleshooting resource covers the full diagnostic process.
Got a few lingering questions about faucet cartridges? We have gathered the ones we hear most often and answered them below.
Frequently Asked Questions About Faucet Cartridges
Is it easy to replace a faucet cartridge?
For most homeowners with basic tool proficiency, yes: it is a manageable DIY repair. The process itself is simple: shut off the water, disassemble the handle, pull the old cartridge, drop in the new one, and reassemble. Where it gets complicated is when mineral deposits have seized the cartridge inside the valve body, which happens more often in hard-water areas like Jacksonville and Clay County than in areas with softer municipal water. A cartridge that slides out cleanly takes 30 to 45 minutes start to finish. One that is calcified in place can take considerably longer and may require a cartridge puller tool. If you are dealing with water pressure issues alongside the leak, that is worth diagnosing separately; a failing cartridge and a pressure problem sometimes share a root cause, but not always.
How do I figure out what faucet cartridge I need?
The most reliable method is to shut off the water, remove the existing cartridge, and take it to a hardware store to match it physically. Bring the whole cartridge, not just a photo; the dimensional differences between models from the same brand can be subtle enough that a side-by-side comparison is the only way to be certain. Look for a brand name or model number stamped or molded into the faucet body near the base of the handle; that narrows the search considerably. If the faucet body has no visible markings, clear photos from multiple angles (top, side, and bottom of the cartridge) give store staff something concrete to work with. Guessing based on a general description almost always leads to a return trip.
Can I replace a faucet cartridge without turning off water?
No. Once the retaining clip or nut is removed and the cartridge breaks its seal with the valve body, water pressure behind it will push it out with force, and water will spray freely from the open valve. There is no way to control or slow that once it starts. Locate the individual shut-off valves under the sink and close them fully before touching anything else. If those valves are corroded or will not close completely, shut off the main supply to the house. Dry floors and a controlled workspace are not optional; they are the baseline condition for doing this repair safely.
How do I know if my faucet cartridge is bad?
The clearest indicators are water dripping from the spout when the handle is fully closed, water seeping around the base of the handle, a handle that is noticeably stiffer or squeakier than it used to be, or an inability to get a consistent temperature mix. These symptoms all point to internal seal failure: either the rubber O-rings have worn through, the cartridge housing has cracked, or both. A cartridge that is failing on the temperature side specifically (hot and cold mixing poorly or not at all) often has a damaged stem rather than just worn seals. In any of these cases, a cartridge replacement is the standard and typically definitive fix.
How long should a faucet cartridge last?
Most quality cartridges are designed for a service life of 5 to 10 years under normal residential use. In Northeast Florida, that range tends to compress toward the lower end. The calcium and magnesium in the local water supply work against rubber seals continuously, and the same mineral scale that makes extraction difficult also accelerates internal wear. Homeowners who notice cartridge failures happening more frequently than every five years should look at the water quality side of the equation: a whole-house softener or a point-of-use filter at the faucet can meaningfully extend fixture lifespan across the entire home, not just at the one faucet you keep repairing.
Can I replace a faucet cartridge myself?
Yes, many homeowners can replace a faucet cartridge with basic tools and careful attention. The process is usually manageable if the faucet parts are accessible and not corroded. However, if the cartridge is stuck, the shutoff valves leak, or you are unsure about the repair, it is safer to call a plumber.
Why is my faucet still leaking after replacing the cartridge?
A faucet may still leak if the cartridge is not seated correctly, the replacement part is incorrect, or another internal component is worn. Damaged seals, worn valve seats, or corrosion inside the faucet body can also cause continued leaking. A plumber can inspect the fixture and determine the true source of the problem.
How long does a faucet cartridge last?
A faucet cartridge can last for several years, but its lifespan depends on water quality, usage, faucet brand, and maintenance. Hard water and mineral buildup can cause cartridges to wear out faster. Using quality parts and addressing leaks early can help extend the life of the fixture.
Do all faucets use cartridges?
No, not all faucets use cartridges. Some older faucets use compression washers, ball valves, or ceramic discs instead. Many modern single-handle and two-handle faucets use cartridges, but the design varies by brand and model.
Is it better to repair or replace the faucet?
If the faucet is in good condition and the cartridge is the only problem, repair is often the better option. If the faucet is old, corroded, damaged, or repeatedly leaking, replacement may be more cost-effective. A professional plumber can help you compare both options.
Replacing a faucet cartridge is one of those repairs that rewards patience more than skill. Take your time on the diagnosis, match the replacement part carefully, and do not force anything that is not moving freely. Most of the time, the job goes smoothly and you end up with a faucet that works better than it has in years. Occasionally, a seized cartridge or a corroded valve body turns a simple swap into something more involved, and that is not a failure on your part. It is just what old plumbing in a hard-water area sometimes looks like. Knowing when to hand it off is as useful as knowing how to do it yourself. We can help.
Whether you need a quick second opinion or want a licensed master plumber to handle the whole repair, Lance Maxwell Plumbing serves Orange Park, Jacksonville, Middleburg, and the surrounding Northeast Florida area. We have been keeping Orange Park and Jacksonville flowing since the ’90s. Plumbing emergencies do not wait for business hours, and neither do we. Call us at (904) 209-9103 or visit our Orange Park plumbing services page to book a visit.
Call Lance Maxwell Plumbing Today
Whether you are replacing a faucet cartridge, upgrading fixtures, dealing with a leak, or planning a larger plumbing project, we are here to help. We are your trusted Jacksonville plumber, proudly serving the Jacksonville and Orange Park areas with more than 31 years of experience in plumbing installation and repair services. Our team offers a full line of plumbing services, including new construction applications, water heater installation, preventive maintenance, and dependable repair solutions. We also provide high-quality plumbing products from trusted brands like Delta, Kohler, and Moen, so our customers can feel confident in the performance and durability of their fixtures. With friendly, knowledgeable staff and on-call 24/7 availability, we are ready to resolve plumbing issues day or night. Contact us today, and one of our representatives will be glad to assist you with your plumbing needs.