
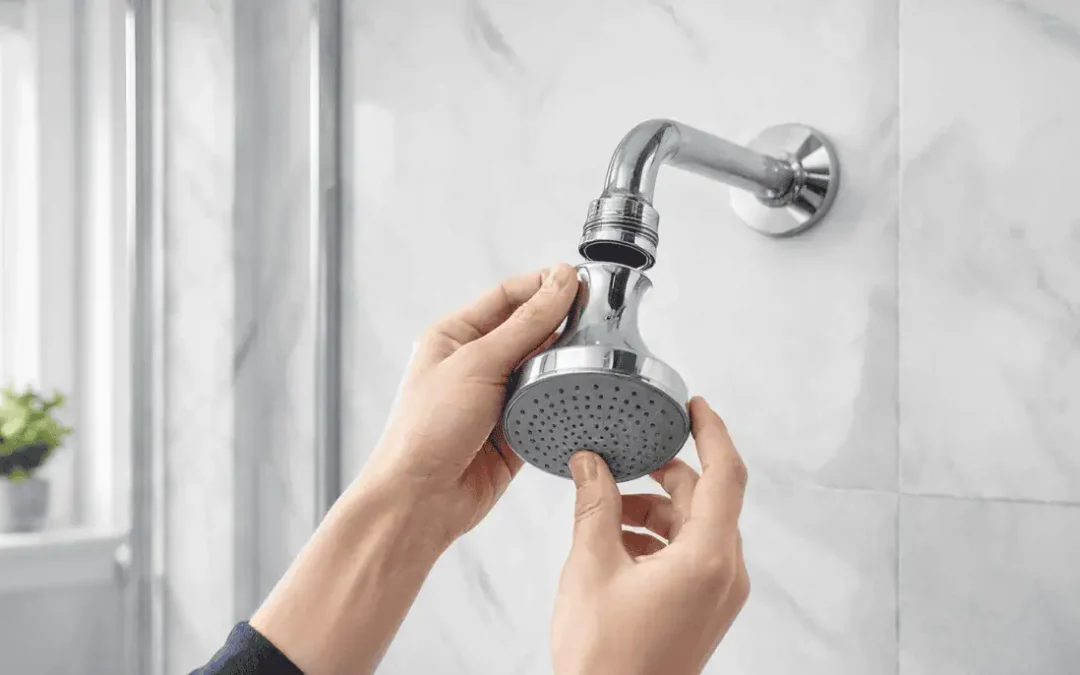
Replacing a shower head is one of the most rewarding home upgrades you can tackle on a Saturday morning, and you don’t need a plumbing license or a garage full of tools to pull it off. Most standard fixtures unscrew in minutes, and the only real skill involved is knowing where the pitfalls hide. No plumber required.
One thing that trips people up right away: you don’t need to shut off the main water supply to your entire house just to swap a shower head. As long as your shower handle is fully in the “off” position, no water moves through the shower arm while you work. That alone removes the biggest worry most homeowners carry into this project. You can do this.
Showering accounts for roughly 17 percent of indoor household water use in the United States, with an average family going through nearly 40 gallons per day, which is a national total approaching 1.2 trillion gallons annually, according to the EPA WaterSense program. A single fixture swap, done right, can put a real dent in those numbers while improving the feel of your morning routine.
Why Upgrading Your Shower Head Makes Perfect Sense
Federal law has capped shower head flow at 2.5 gallons per minute (gpm) for any fixture manufactured and sold in the United States after January 1, 1994, per the Department of Energy’s Federal Energy Management Program. That baseline is already better than the unrestricted fixtures of earlier decades, but modern WaterSense certified models push the ceiling down to 2.0 gpm or less, according to EPA WaterSense standards. The gap between 2.5 and 2.0 gpm doesn’t sound significant until you run the math across a full year.
A family that retrofits with a WaterSense labeled fixture saves roughly 2,700 gallons of water and more than 330 kilowatt-hours of electricity annually, per EPA WaterSense data. That electricity reduction comes from the water heater working less: fewer gallons heated means a measurable drop in your energy bill, not just your water bill.
The historical knock on low-flow fixtures is worth addressing directly. We get it. Early 1990s water-saving models often produced a thin, unsatisfying trickle, and that reputation lingered long after the technology improved. Modern WaterSense certified fixtures must pass independent laboratory testing for spray force and distribution, developed through collaboration between the EPA and the ASME/CSA Joint Harmonization Task Group on Plumbing Fittings. The result is a fixture that conserves water without making you feel like you’re rinsing shampoo under a garden hose.
For homeowners in Orange Park, Middleburg, and Jacksonville specifically, there’s another practical reason to swap out an aging fixture. Municipal water in Northeast Florida carries enough mineral content to scale up older shower heads over time. When calcium and magnesium deposits clog the spray nozzles, water pressure drops noticeably. A replacement restores full flow and gives you a clean slate. Enjoy the difference.
What You Need Before You Begin
Preparation makes the difference between a 15-minute swap and a frustrating hour of stripped threads and scratched chrome. Preparation is key. Most shower heads are designed to unscrew by hand, but having a few tools nearby prevents the job from delaying if the old fixture has been sitting in place for years.
The most important technique before you reach for any metal tool is the “rag barrier.” It works wonders. Polished chrome, brushed nickel, and matte black finishes scratch easily when bare metal contacts them. Wrapping a soft cloth around the connection before applying a wrench protects the finish of both the old fixture and the new one: a detail that costs nothing and saves you from a cosmetic repair on a brand-new installation.
Here’s what to have on hand before you start:
- New shower head: Choose a WaterSense certified model (2.0 gpm or less) for efficiency gains backed by EPA WaterSense standards.
- Thread-seal tape (plumber’s tape): Also called Teflon tape, this creates a watertight seal on the shower arm threads and is non-negotiable for a leak-free install.
- Adjustable wrench or slip-joint pliers: For loosening a fixture that won’t budge by hand.
- Microfiber cloth or rag: To protect the finish from tool marks during removal and installation.
- Old toothbrush and white vinegar: For scrubbing mineral deposits and old tape residue off the shower arm threads before the new unit goes on.
- A replacement washer or O-ring is usually included with the new shower head, but inspect it before installation: that small rubber ring is what keeps water from weeping out of the back of the connection, per EPA WaterSense guidance.
If you’re dealing with a shower head that’s completely stuck, corroded solid to the arm, or if you’re worried about the pipe shifting inside the wall, that’s a good moment to call in a professional rather than force it. Your neighbors at Lance Maxwell have been helping homeowners across Northeast Florida since the ’90s. If you need a hand, call (904) 209-9103 or explore our Orange Park plumbing services to schedule a hassle-free installation.
Step-by-Step Shower Head Replacement Guide
Removing the old shower head is usually the most physically challenging part of the job, and it’s over quickly. Grip the shower head body and turn it counter-clockwise. Lefty loosey. If it doesn’t move by hand, wrap your cloth around the connection nut and use your wrench, but keep your other hand braced against the shower arm itself. That arm runs through the wall and connects to a fitting behind the tile. If it rotates while you’re applying torque, you can crack or loosen that fitting, which converts a simple swap into a wall repair.
Step 1: Turn Off the Shower
For most basic shower head replacements, you do not need to shut off the water supply to the entire home. You should, however, make sure the shower faucet is fully turned off before you begin. This may sound obvious, but plumbing work has a way of reminding people when they skip the obvious steps. If the faucet is leaking or difficult to shut off completely, that may indicate a separate issue with the valve. In that case, it may be best to have a professional plumber take a look before moving forward.
Once the shower is off, place a towel on the floor of the tub or shower area. This can help catch any small parts that fall during the project and protect the surface from tools. It also helps absorb any leftover water that drains from the old shower head after removal. If you are working in a tiled shower, a towel can reduce the chance of a dropped wrench causing damage. Small preparation steps like this can save you a headache later.
Step 2: Remove the Old Shower Head
To remove the old shower head, start by turning it counterclockwise by hand. In many cases, it will loosen without much effort. If it is stuck, use an adjustable wrench or pliers, but place a soft cloth around the connection first to protect the finish. Hold the shower arm steady while loosening the shower head so you do not accidentally twist or damage the pipe coming out of the wall. The shower arm is connected to plumbing behind the wall, so it is important not to use excessive force.
If the shower head will not budge, mineral buildup or corrosion may be the reason. You can try soaking the connection area with white vinegar to help loosen deposits. Let it sit for a little while, then try again gently. Avoid forcing the fixture, especially if the shower arm looks old, rusty, or unstable. When a simple replacement starts feeling like a wrestling match, that is usually a good sign to call a plumber before something breaks behind the wall.
Step 3: Clean the Shower Arm Threads
After removing the old shower head, take a moment to inspect the threads on the shower arm. You may notice old plumber’s tape, mineral deposits, or grime around the connection. Use your fingers, a cloth, or a small brush to clean the threads thoroughly. If there is old tape, remove it completely before applying new tape. A clean connection helps the new shower head attach properly and reduces the chance of leaks.
If mineral buildup is heavy, white vinegar can help dissolve it. Apply vinegar with a cloth or soak the end of the shower arm if possible. Then scrub gently with an old toothbrush or small cleaning brush. Be careful not to damage the threads, since they are needed to create a secure seal. Once the threads are clean and dry, you are ready for the next step.
Step 4: Apply Plumber’s Tape
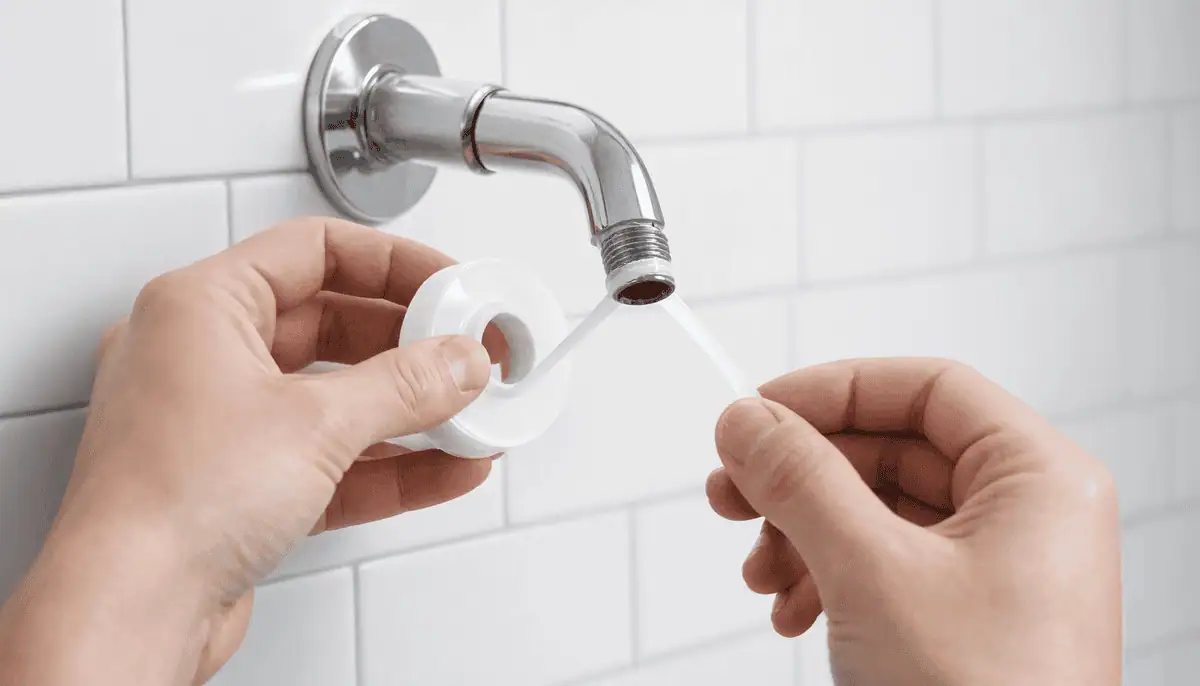
Plumber’s tape helps seal the threaded connection between the shower arm and the new shower head. To apply it correctly, wrap the tape clockwise around the threads of the shower arm. This direction matters because the shower head will also tighten clockwise, which helps the tape stay in place instead of unraveling. In most cases, two or three wraps are enough. You want a smooth layer, not a bulky wad of tape.
Press the tape gently into the threads so it sits securely. Avoid covering the opening of the shower arm, since water needs a clear path through the pipe. If the tape bunches up or looks uneven, remove it and start again. It only takes a few seconds to redo, and a clean application can help prevent leaks. Think of plumber’s tape as the tiny detail that quietly does a very important job.
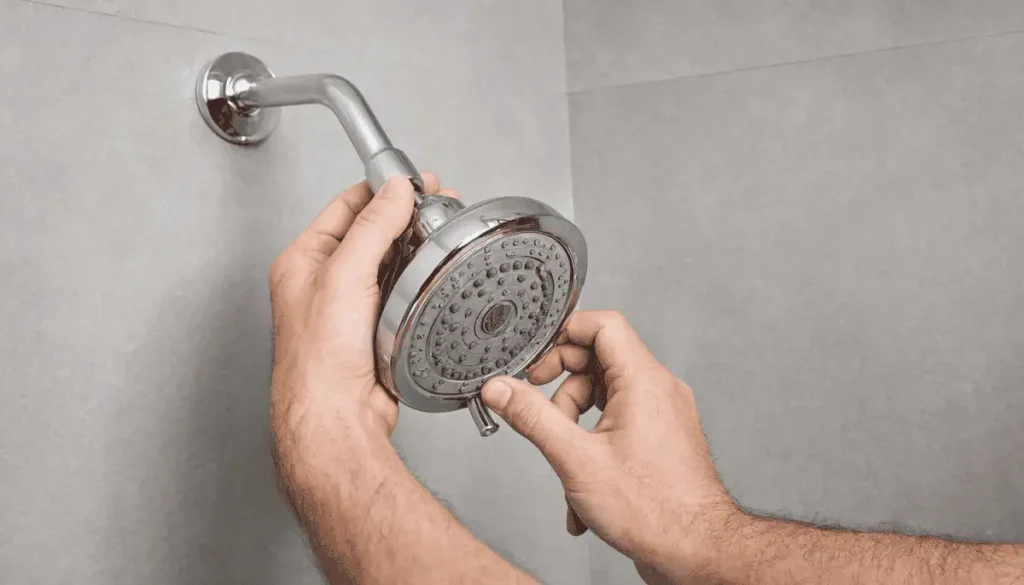
Step 5: Install the New Shower Head
Now it is time to attach the new shower head. Carefully thread it onto the shower arm by turning it clockwise. Start by hand to make sure it lines up properly and does not cross-thread. Cross-threading can damage the connection and cause leaks, so do not force it if it feels crooked or difficult to turn. Back it off and try again until it turns smoothly.
Once the shower head is hand-tight, you may use a wrench or pliers to tighten it slightly more, depending on the manufacturer’s instructions. Again, use a soft cloth to protect the finish. Be careful not to overtighten, because too much pressure can crack parts or damage the threads. Many modern shower heads are designed to seal well without extreme force. Snug is usually the goal, not superhero strength.
Step 6: Test for Leaks
After the new shower head is installed, turn on the shower and check the connection point carefully. Look for dripping or spraying water around the threads. If you see a small leak, turn the water off and gently tighten the shower head a little more. If it still leaks, remove the shower head, check the tape, and reapply it if needed. Sometimes the tape may have shifted during installation.
Also, check the spray pattern and water pressure. A new shower head should provide a steady, even flow. If the pressure still seems weak, the issue may not be the shower head itself. There could be mineral buildup in the shower arm, a clogged cartridge, a pressure issue, or another plumbing concern. When replacing the shower head does not solve the problem, it may be time to have the system inspected.
A few things to keep in mind as you finish the installation:
- Directional wrap: Clockwise tape application ensures the wrap tightens as you thread the fixture on, rather than peeling away from the threads.
- Hand-tighten first: Always start threading by hand to avoid cross-threading, which can permanently strip the plastic or metal threads on either the arm or the new fixture.
- Final snug: Once hand-tight, give it a final quarter-turn with a cloth-wrapped wrench. Do not overtighten: cracking an internal plastic fitting creates a slow leak that can go undetected behind your wall for weeks.
- Leak test: Turn the shower on slowly and watch the connection point for 30 seconds. A drip from the threads means you need a slight additional turn or a fresh application of tape.
[MISSING: attributed quote]
Crucial Plumbing Safety and Pressure Checks
A shower head swap feels like a purely mechanical task, but there’s a system-level consideration that most DIY guides skip entirely. High-efficiency fixtures rated at 2.0 gpm or less require household water pressure to fall within a specific range, between 20 and 80 pounds per square inch (psi), in order to perform as designed, according to Department of Energy FEMP guidelines. Pressure below that range produces weak spray regardless of the fixture’s quality. Pressure above it forces more water through than the rated flow rate, erasing the efficiency gains you installed the fixture to achieve.
If your shower has always felt underpowered, a new head may not resolve it. The root cause could be a partially closed supply valve, a failing pressure regulator, or mineral accumulation in the pipes themselves. Diagnosing that requires a different approach. Our guide on troubleshooting low water pressure covers the most common causes and how to work through them systematically.
The mixing valve question is one that national DIY content almost never raises, and it’s worth understanding before you install. When you drop from a 2.5 gpm fixture to a 2.0 gpm or lower model, the reduced flow rate alters the pressure forces inside your shower valve. If your home has an older valve that isn’t rated as an auto-compensating mixing valve, either thermostatic or pressure-balancing, it may not handle that flow change correctly. The practical outcome is that flushing a toilet elsewhere in the house can trigger a sudden temperature spike at the shower, which is more than uncomfortable. Verifying that your mixing valve is compatible with a lower-flow fixture is a simple check that a licensed master plumber can perform in a short visit, per Department of Energy FEMP guidance.
[Inline Image]PLACEHOLDER A clean, cross-section diagram of a residential shower wall showing a pressure-balancing mixing valve connected to hot and cold supply lines. Arrows indicate the flow of water through the valve and out to the shower arm. A callout label highlights the pressure-balancing mechanism inside the valve body. The diagram uses a muted blue and white color palette with clear, legible labels. The style is technical but approachable, suitable for a home improvement blog audience.[/Inline Image]Your family’s safety is the priority here. If you’re unsure whether your shower’s mixing valve is compatible with a new high-efficiency fixture, or if you’ve been experiencing sudden temperature swings mid-shower, a professional inspection is the right call. Lance Maxwell Plumbing serves Duval and Clay Counties and has been keeping homes safe and comfortable since the ’90s. Call (904) 209-9103 to schedule a professional inspection.
Florida Building Code and Local Plumbing Standards
There’s a code detail that catches Florida homeowners off guard when they move beyond a simple shower head swap. Under the Florida Building Code’s residential plumbing standards, individual shutoff valves are not required on bathtubs and showers in one- and two-family residential occupancies, per the Florida Building Code. That means if you ever need to go deeper than a fixture swap, such as replacing a shower cartridge, addressing a leaking valve body, or doing anything behind the tile, you’ll need to isolate the water supply at the main service entry or a branch valve rather than at a dedicated shower shutoff.
For a basic shower head replacement, this isn’t an issue. Your shower handle controls flow to the arm while you work. No leaks, no hassle. But it’s useful context if a repair escalates unexpectedly mid-project.
The Florida Building Code also mandates that hot water be supplied to all plumbing fixtures used for bathing or washing in occupied structures. Any modifications to your home’s water supply system must comply with Florida Statute 373 on water resource management, and all replacement fittings or pipes must meet NSF 61 lead-free standards. These requirements apply to professional work as much as DIY, so if your project grows in scope, make sure whoever touches the pipes is working with compliant materials.
A quick summary of the local code points most relevant to this project:
- No local shutoffs: Florida residential code does not require individual shutoff valves on showers, so plan to use the main valve for any work beyond the fixture itself.
- Hot water requirement: All bathing fixtures in occupied Florida structures must have a functioning hot water supply.
- Lead-free materials: Any replacement fittings or pipes must meet NSF 61 lead-free standards.
- Jacksonville and Orange Park municipal water carries enough mineral content to accelerate thread scaling, making thread cleaning before every installation an essential step rather than an optional one.
Download Our Free DIY Bathroom Maintenance Checklist [MISSING: downloadable asset] to learn which plumbing tasks are safe for DIY and when you should call a licensed master plumber.
There are moments when a shower head project reveals something bigger. Do not ignore them. A shower arm that wobbles when you grip it, heavily corroded copper at the connection point, or threads that are stripped beyond recovery: these are signs to stop and call a professional. A slow, undetected leak behind tile can cause structural rot and mold damage that costs far more to fix than the original plumbing repair would have.
Frequently Asked Questions About Replacing a Shower Head
A few of the most common questions homeowners ask before tackling this project carry assumptions that can lead to real mistakes, so they’re worth addressing directly.
Can I change my shower head by myself?
Yes, and for most homeowners it’s genuinely one of the more straightforward home maintenance tasks available. Standard fixtures swap out in under 15 minutes with an adjustable wrench and plumber’s tape. The exception is when you encounter frozen threads or a corroded shower arm: at that point, forcing the connection risks breaking the arm inside the wall, and a plumber is the smarter call.
Do you have to turn the main water off to change a shower head?
No. As long as your shower handle is fully in the “off” position, no water flows through the shower arm while you work. You don’t need to touch the main supply valve for a straightforward fixture swap. The only time that changes is if you’re doing work that requires opening the wall or replacing components inside the valve body itself.
Do shower heads just unscrew?
Most do: counter-clockwise rotation is standard, and many come off by hand. Mineral buildup can bond the fixture to the arm over time, which is when a cloth-wrapped wrench becomes necessary. Always hold the shower arm steady with your free hand while you apply torque, because a twisted arm fitting behind the tile is a considerably larger repair than a stuck shower head.
Do you need a plumber to change a shower head?
Not for a standard swap. It’s a task most homeowners can complete without professional experience. Where a plumber adds real value is in situations involving a damaged shower arm, a complex multi-function fixture system, or any work that requires verifying mixing valve compatibility with a new high-efficiency model.
Do all shower heads fit all showers?
Most residential shower heads use a standard half-inch pipe thread connection, so compatibility is rarely an issue with typical fixtures. It’s worth checking the details on both the shower arm and the new unit before purchasing, particularly if you have an older home or a non-standard European fixture that may require an adapter.
Can we replace a shower head without turning off the main water supply?
Yes, in most cases, the main water supply does not need to be turned off. As long as the shower faucet is fully off, you can usually replace the shower head safely. If the faucet will not shut off completely, call a plumber before starting.
Do we need plumber’s tape for a new shower head?
Plumber’s tape is usually recommended because it helps create a watertight seal at the threaded connection. Some shower heads include rubber washers that do most of the sealing, but tape can still help prevent small leaks. Always check the manufacturer’s instructions.
Why is the new shower head leaking?
A new shower head may leak because the connection is not tight enough, the plumber’s tape was applied incorrectly, or the washer is missing or not seated properly. Remove the shower head, inspect the parts, reapply tape if needed, and reinstall it carefully. If it still leaks, there may be another plumbing issue.
How often should we replace a shower head?
There is no strict timeline, but many homeowners replace a shower head when it becomes clogged, leaks, rusts, or no longer performs well. If cleaning does not restore proper water flow, replacement is often the best option. Upgrading can also improve comfort and water efficiency.
Can a new shower head improve water pressure?
A new shower head may improve the feel of water pressure if the old one was clogged or inefficient. However, it will not fix deeper plumbing pressure problems. If pressure remains low throughout the home, a plumber should inspect the system.
What type of shower head is best?
The best shower head depends on your preferences, bathroom setup, and budget. Handheld models are versatile, rainfall shower heads feel luxurious, and water-saving models can reduce usage. We recommend choosing a quality product from a trusted brand.
Replacing a shower head is one of those projects that rewards a little patience and preparation with a noticeably better daily experience, and, over the course of a year, real savings on water and energy bills. Taking the time to clean the threads, wrap the tape correctly, and inspect the washer before installation is what separates a professional-grade result from a slow drip you’ll be chasing for months.
If you run into stubborn corroded pipes, a loose or wobbly shower arm, or anything that gives you pause, your neighbors at Lance Maxwell are here day or night. We treat every home like it belongs to a neighbor, providing reliable plumbing services in Jacksonville and across the surrounding communities.
Ready to upgrade your bathroom without the DIY stress? Whether you need a quick fixture swap, a mixing valve safety check, or have a sudden plumbing emergency, your neighbors at Lance Maxwell are here day or night. We’ve been serving Orange Park, Jacksonville, Middleburg, and Clay and Duval Counties since the ’90s. We’re here day or night to help your family. Call us today at (904) 209-9103 to schedule your service with straightforward pricing and no surprises.
Call Lance Maxwell Plumbing for Trusted Plumbing Service
Replacing a shower head can be a simple upgrade, but plumbing problems are not always as straightforward as they look. If you need help with shower fixtures, leaks, water pressure issues, plumbing installation, water heater installation, preventive maintenance, or emergency plumbing repairs, we are here to help. We have more than 31 years of experience providing Jacksonville and Orange Park with dependable plumbing installation and repair services. Our friendly and knowledgeable staff will do whatever it takes to ensure every customer’s needs are met.
As your trusted Jacksonville plumber, we offer a full line of plumbing services for homes, businesses, and new construction applications. We are available on call 24/7, so you can rest assured that our team will be there to resolve your plumbing issues, day or night. To accompany our premium services, we also offer high-quality plumbing products from brands like Delta, Kohler, and Moen. Contact us today, and one of our representatives will be glad to assist you in addressing your plumbing needs.